ProxmoxVE, virtual OPNsense to protect underlying VMs
Given the quantity of scrappers searching vulnerabilities on webpages and systems nowadays, deploying more advanced tools to protect the systems aside from firewalls is becoming essential.
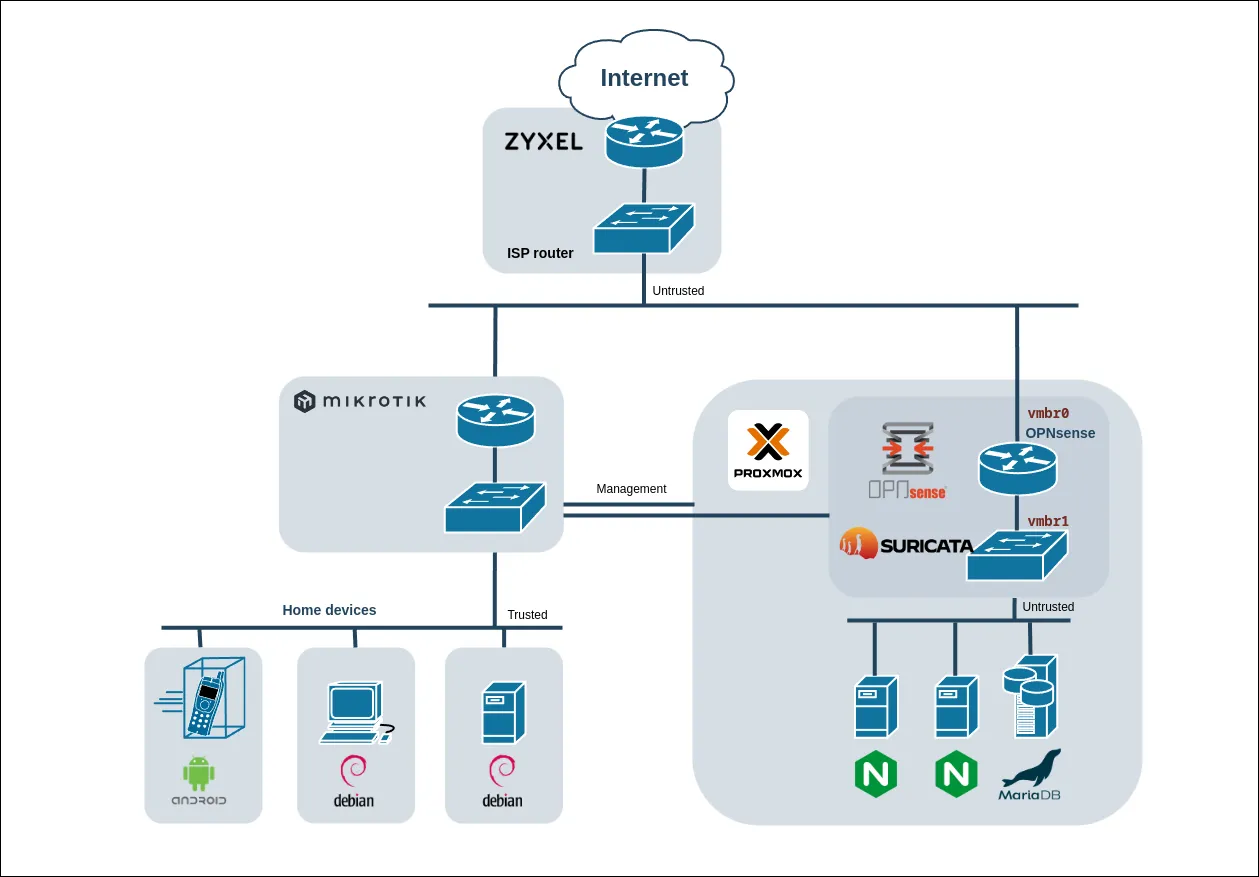
With the requirement minimizing power costs. This guide focuses on converting a server into a Proxmox machine that hosts a firewall with advanced capabilities to protect the web servers that are virtualized under the secured subnet.
On this guide an interface will be dedicated to management for proxmox and OPNsense together. Allowing you to manage everything from your own subnet.
To protect the underlying machines suricata will be deployed using OPNsense. suricata is an IPS that will be able to detect and stop server intrusions as well as unwanted traffic pointing to the webpages or exposed services.
Adding an on OPNsense was the way to go due it's ease of deployment, open-source and no license costs. OPNsense also allows the deployment of other advanced features like pfblocker or zenarmor.
Note:
The Zyxel device has not been converted to bridge mode or replaced by a custom firewall to allow the network to be re-deployed in case of changing home. Contact your ISP about the authentication method if you want to replace it with a custom router. Depending on the company they will be glad to help you, as we do at my workplace ib-red, or as my old provider offered, an astronomical price for an enterprise connection that you could later add your own router...
If you spot any typos, have questions, or need assistance with the build, feel free to contact me at: antonimercer@lthjournal.com
This guide contains no affiliate links or ads. If you'd like to support this or future projects, you can do so here:
By supporting monthly you will help me create awesome guides and improve current ones.
After this brief introduction about the decision-making of the project, let's start with the setup.
Virtual networking setup
After installing ProxmoxVE two bridges need to be created, one for the WAN and another for the LAN. Depending if a slave port is selected on a hardware interface the network will be available outside the machine. Because the WAN is in another subnet than the management port we will select a slave port available and do not inset CIDR, gateway or IPV6.
Go to: Datacenter > pve > System > Network > Create
Create two Linux Bridges, one for LAN and the other for WAN and leave them empty except the comment. Add an unused slave interface if you want to expose them physically. Once all the networks has been created check the configuration to avoid locking yourself out and apply the changes.
Note:
If you don't want to expose the networks leave the slave port empty otherwise select the slave port as the physical interface that will be bridged to the internal proxmox virtual network.
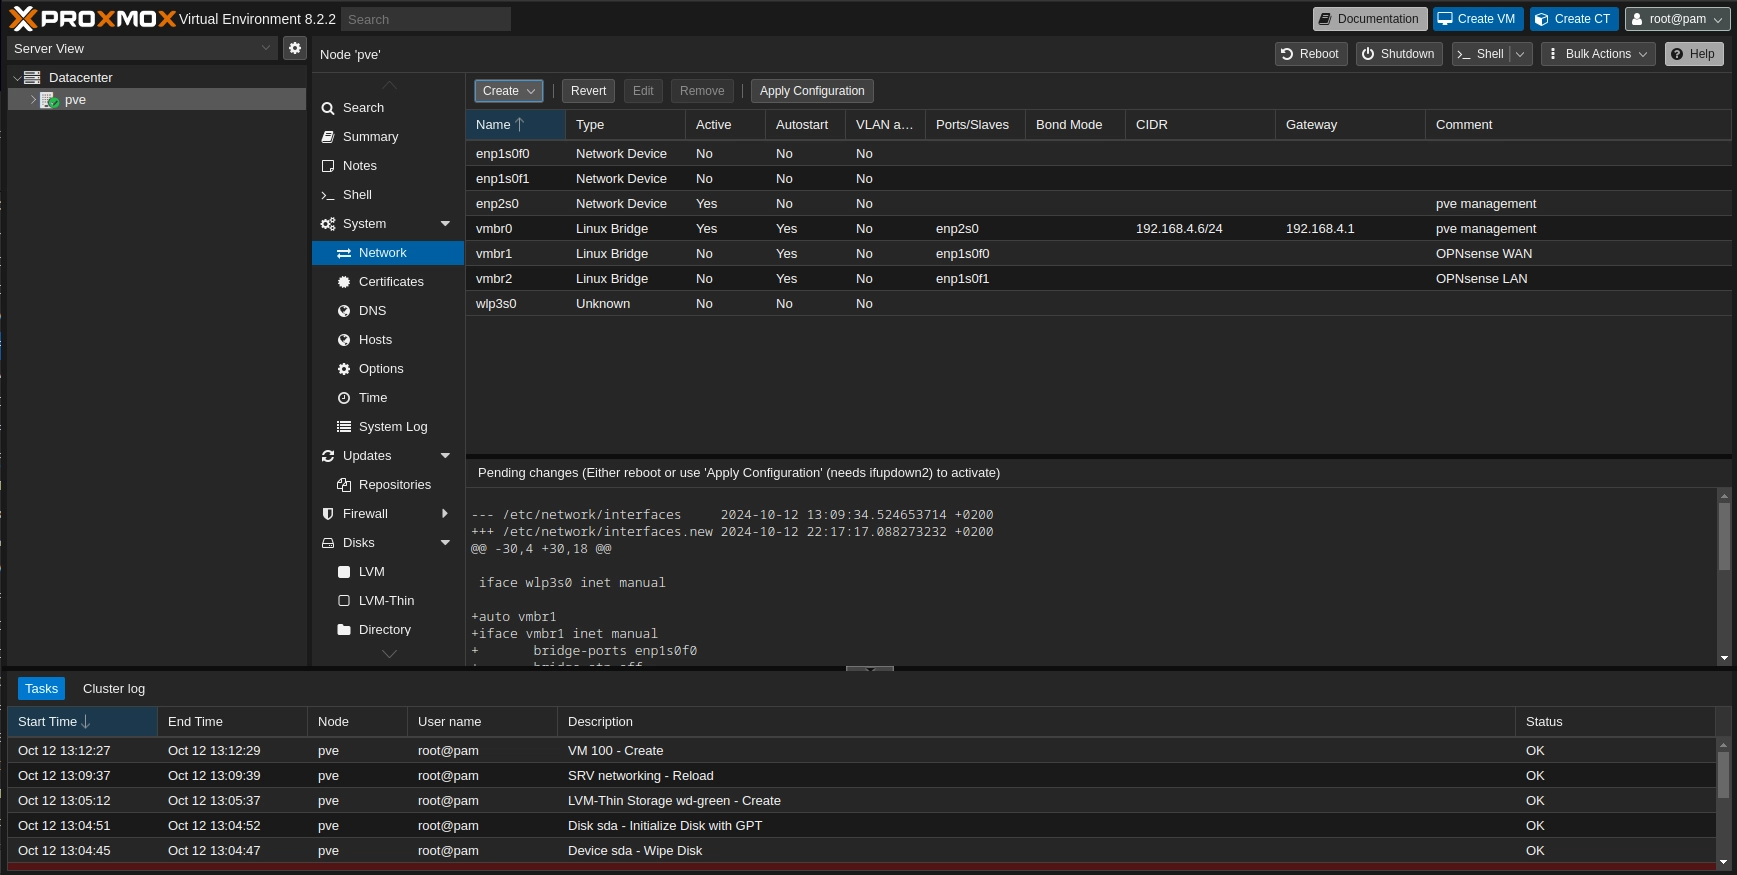
pve web interface after two Linux Bridges have been created
OPNsense installation inside Proxmox VM
After downloading, extracting, and re-uploading OPNsense to proxmox the VM can be created. On the OPNsense download page select dvd image type to make sure you can boot the image as an usb installer.
For this VM two cores have been allocated. 16GiB of storage and 4096MiB of RAM. During the creation process only one nick can be selected therefore once the VM has been created the second nick has to be added.
On the image above you can see that the two Linux Bridges created in the previous sections have been added to the VM hardware. They will act ast the WAN and LAN.
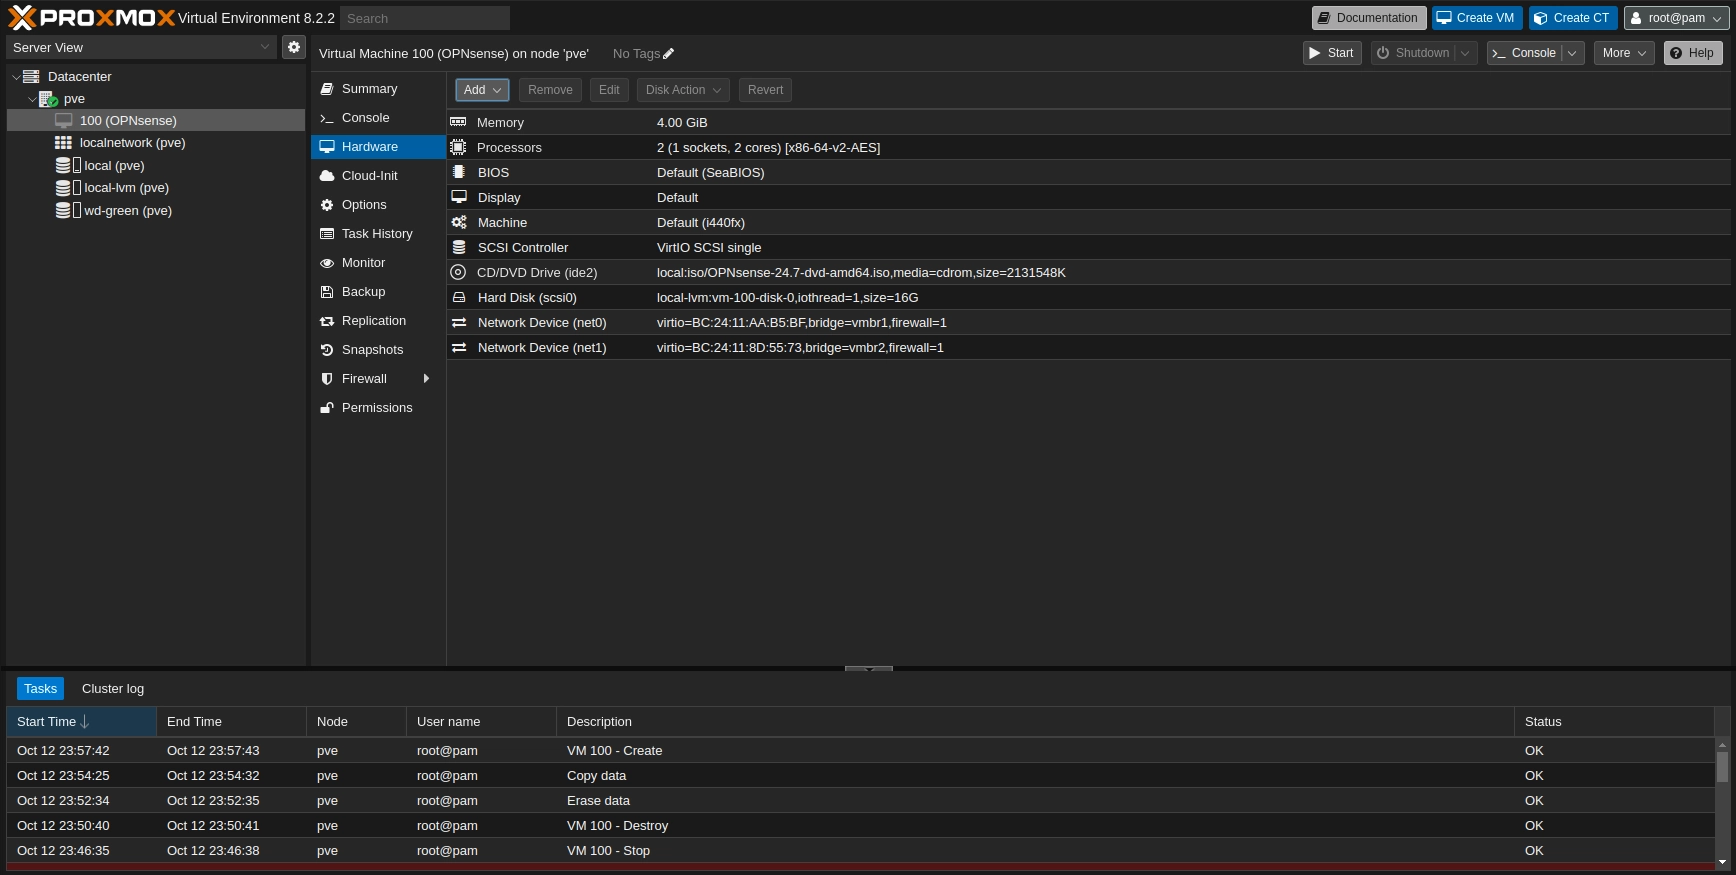
OPNsense hardware page
Now OPNsense must be installed.
Boot the VM and wait till it asks for login. Login using the user: installer and password: opnsense
Select your keymap and continue selecting GPT/UEFI partition mode.
Now let the installer clon the system into the disk.
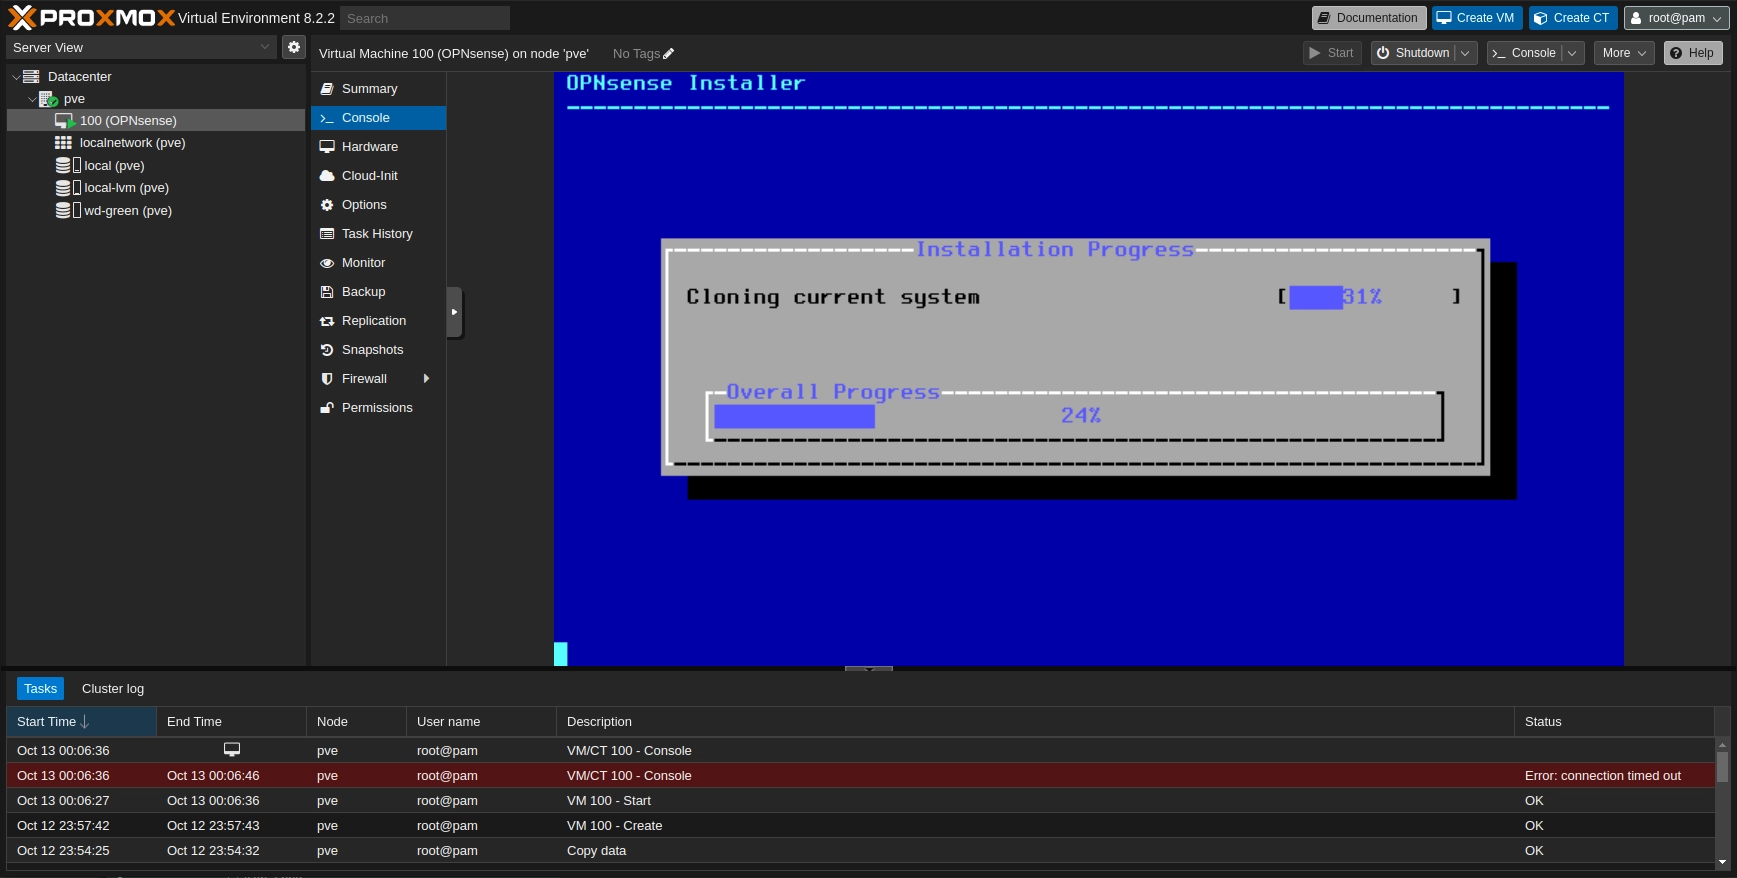
OPNsense installation process
Change the default root password before finishing the process. While the vm reboots stop it and remove the CD/DVD drive as it is no longer needed.
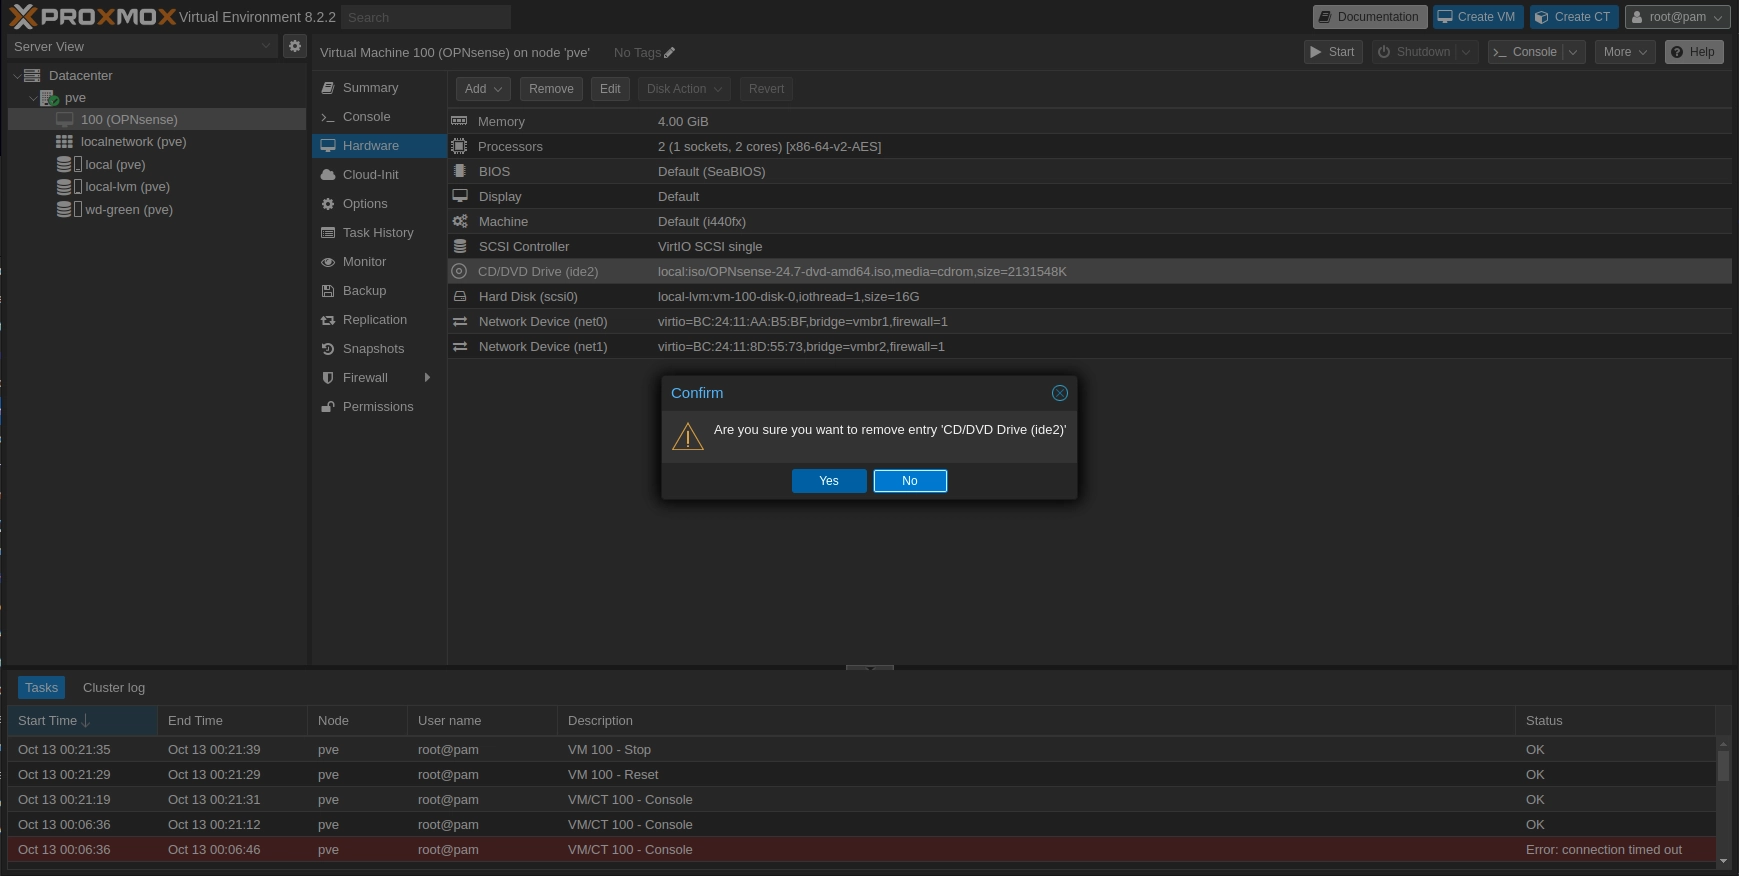
Proxmox popup asking if you want to remove CD/DVD Drive
Now you can boot again the vm and login using root and the password that you selected the previous step.
Once you have done login select the option 1; Assign interfaces
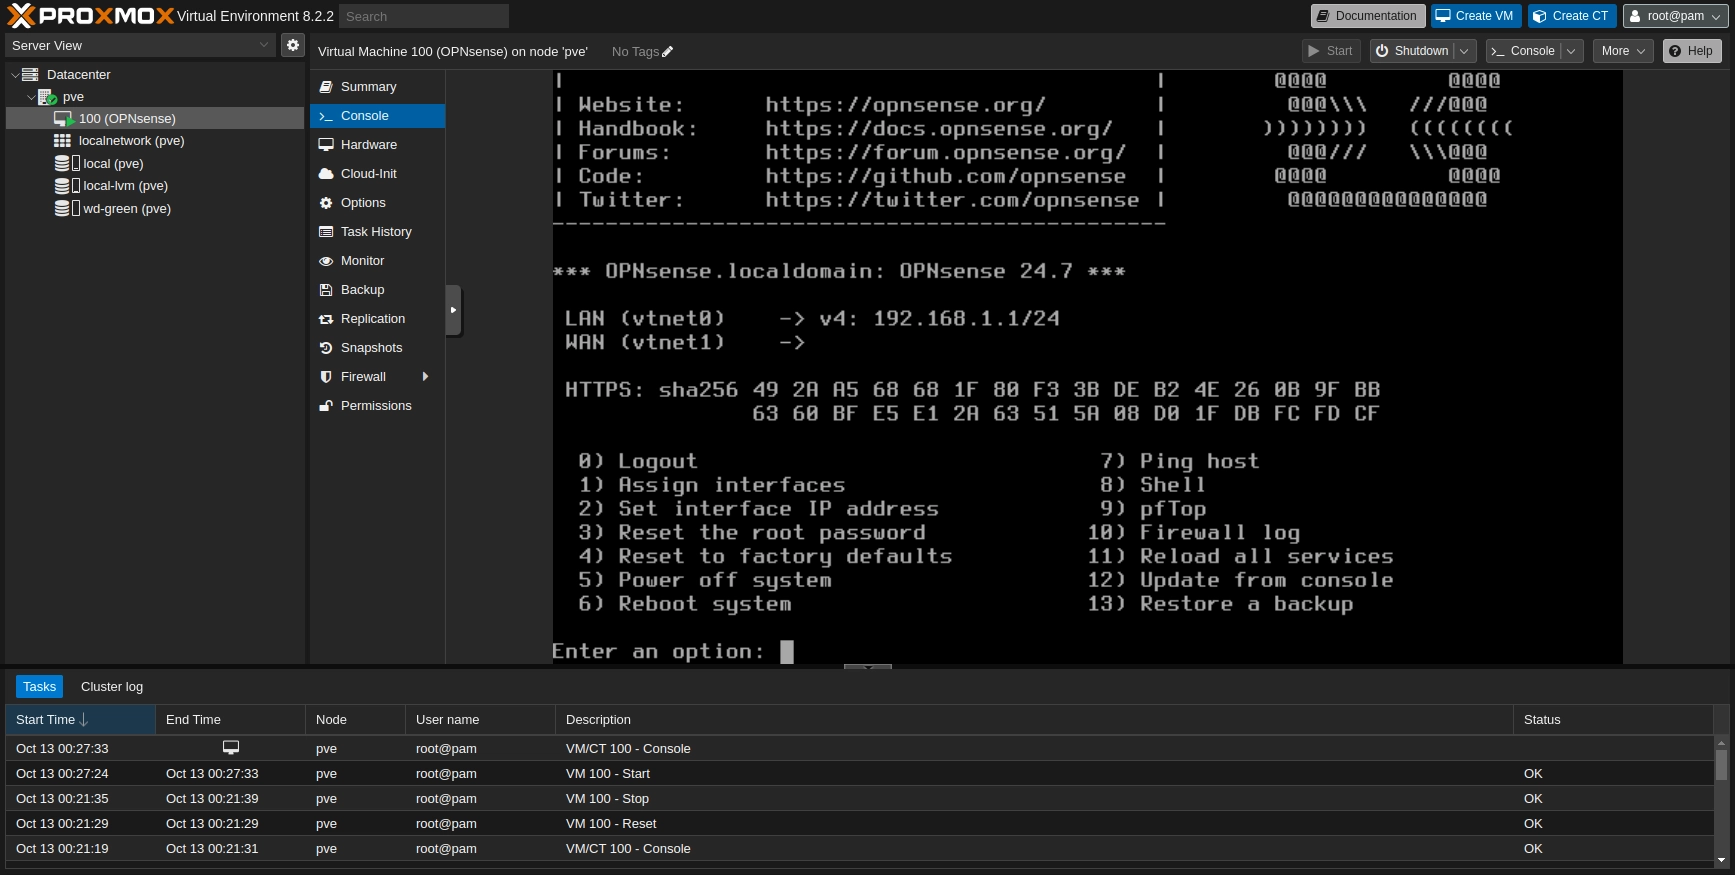
Default OPNsense menu after login
Select no with n to LAGs and VLANs configuration if you won't use them.
Now you will be presented with the two interfaces and asked to select the WAN. You can go to HARDWARE page of the VM and check the Linux Bridge MAC address. If you don't recall witch one you selected as WAN go to pve > System > Network and check the comment to find witch bridge is the WAN and which is LAN.
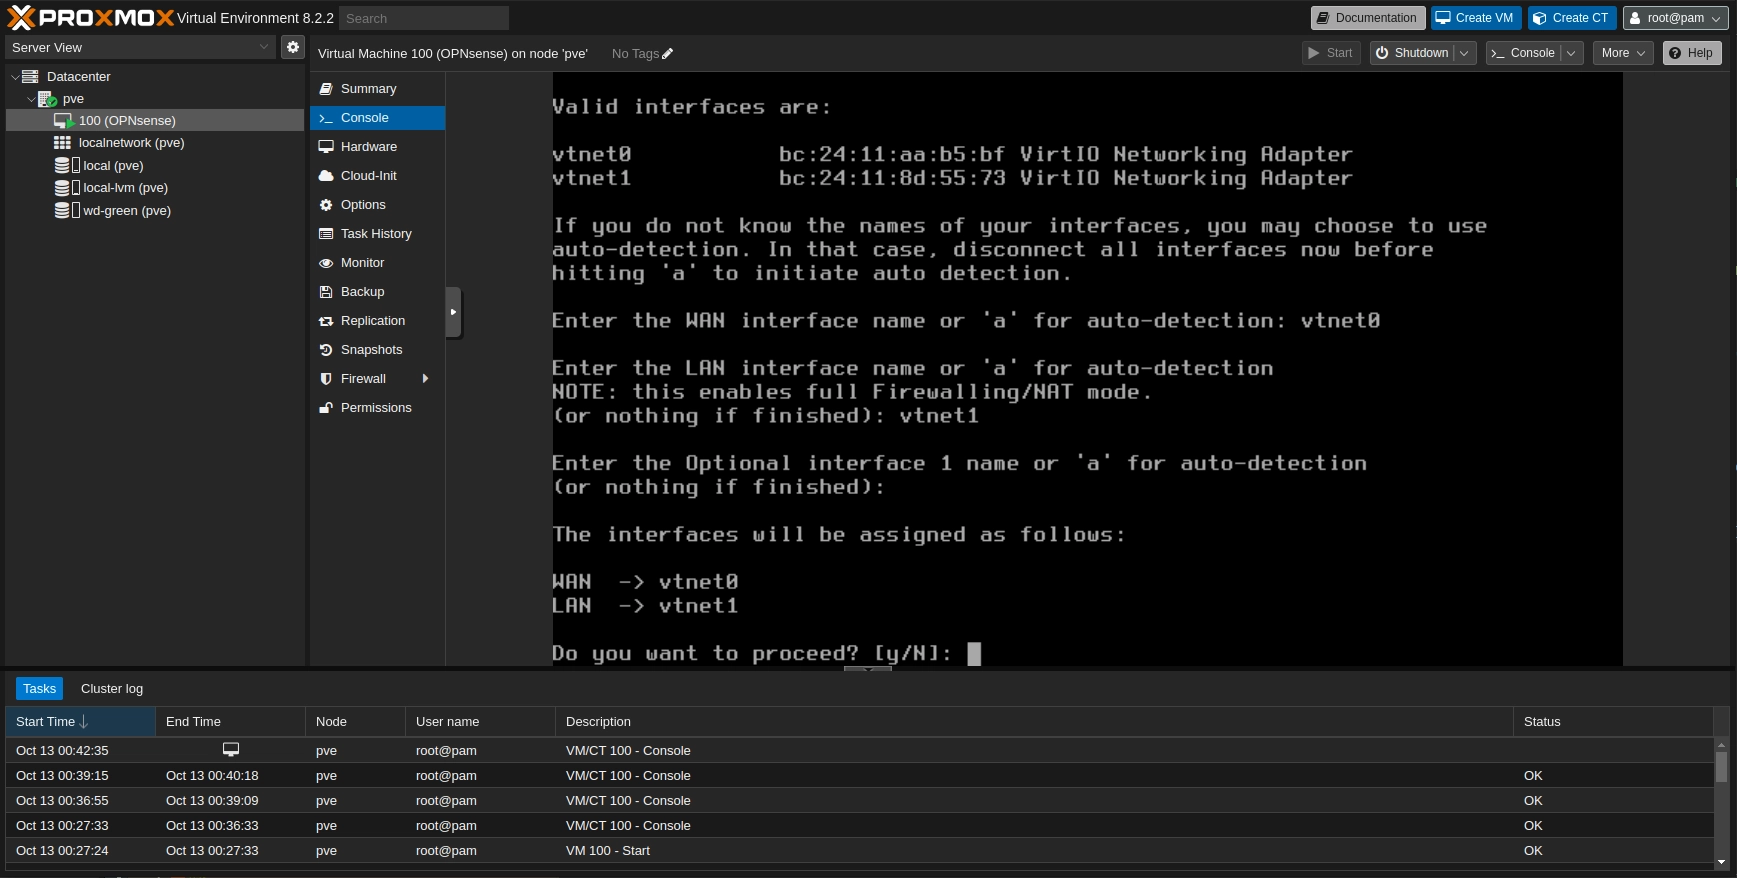
OPNsense interface assignment confirmation
After you have confirmed that the networks are correct the DHCP of the ISP router will assign IP to the WAN of the OPNsense. Note that now to set up the LAN and configure the DHCP of the OPNsense a cable will have to be plugged from the LAN hardware port.
Note:
For the next step we need to connect on the OPNsense LAN subnet. This can be achieved by connecting a cable from the LAN physical port to the computer.
OPNsense configuration wizard
OPNsense LAN is by default at the subnet 192.168.1.0/24 therefore you will be provided an IP from that range. After connecting a wire to the LAN port, write https://192.168.1.1/ in the browser.
This first time that OPNsense GUI is accessed it will ask to run the configuration wizard. This procedure will be used to set the initial configuration.
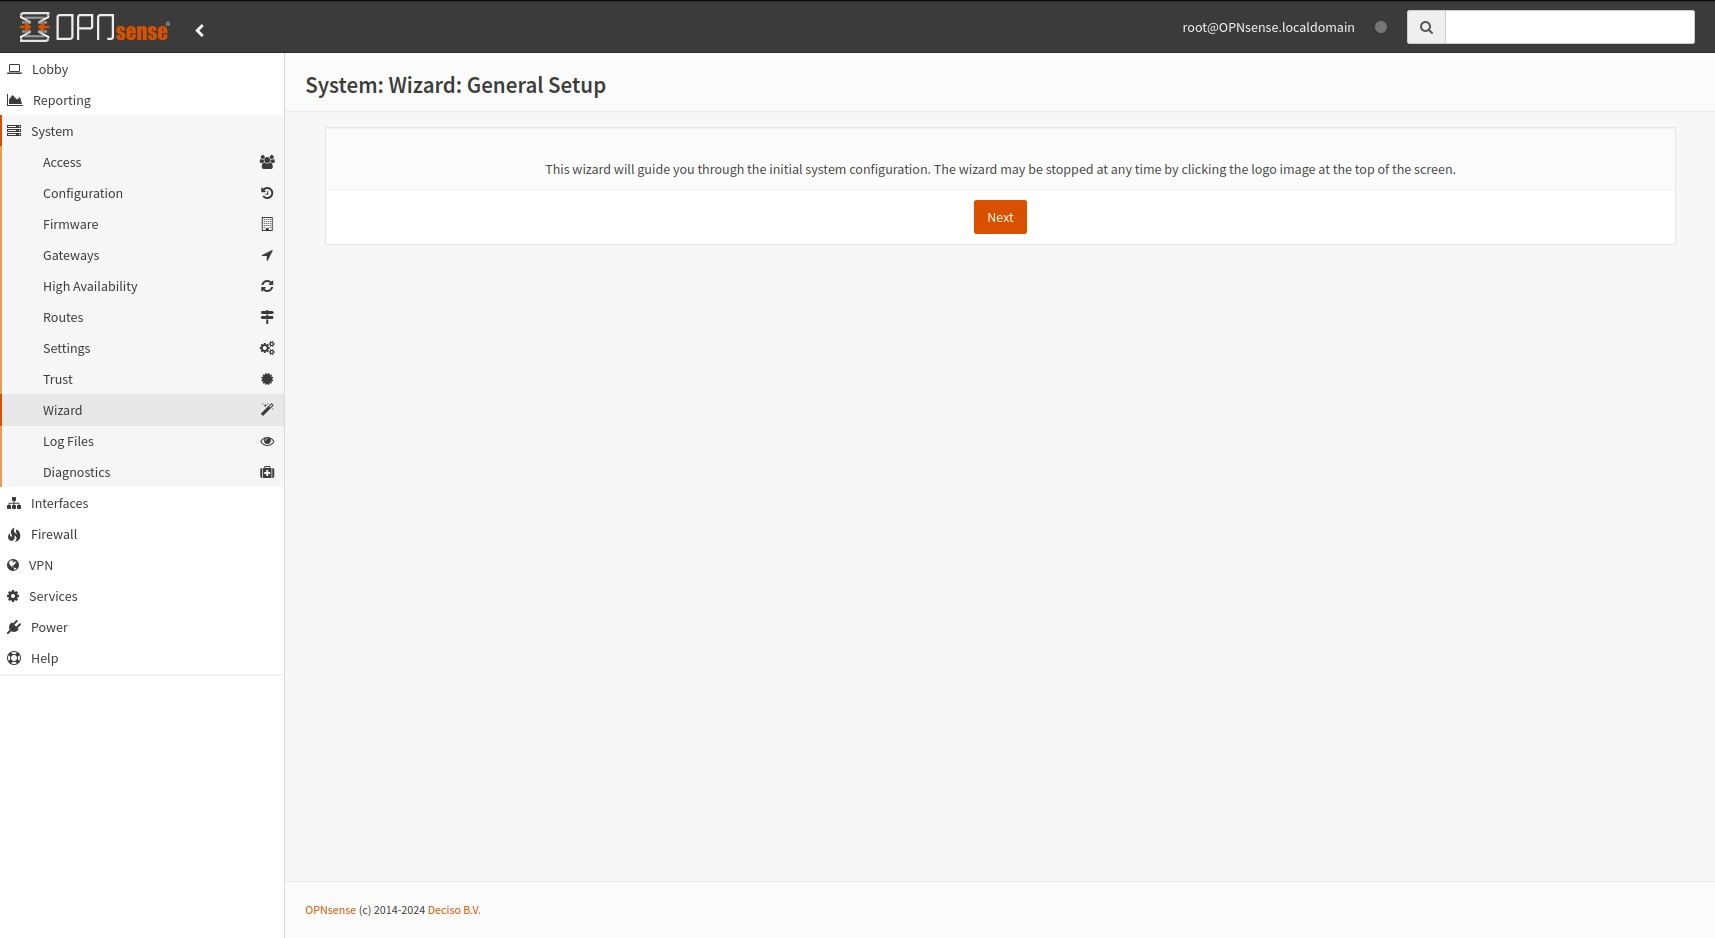
OPNsense wizard
On the general information a hostname must be selected, for the DNS servers I have selected OpenDNS IPs 208.67.222.222, and 208.67.220.220, keep the rest of the fields as they are.
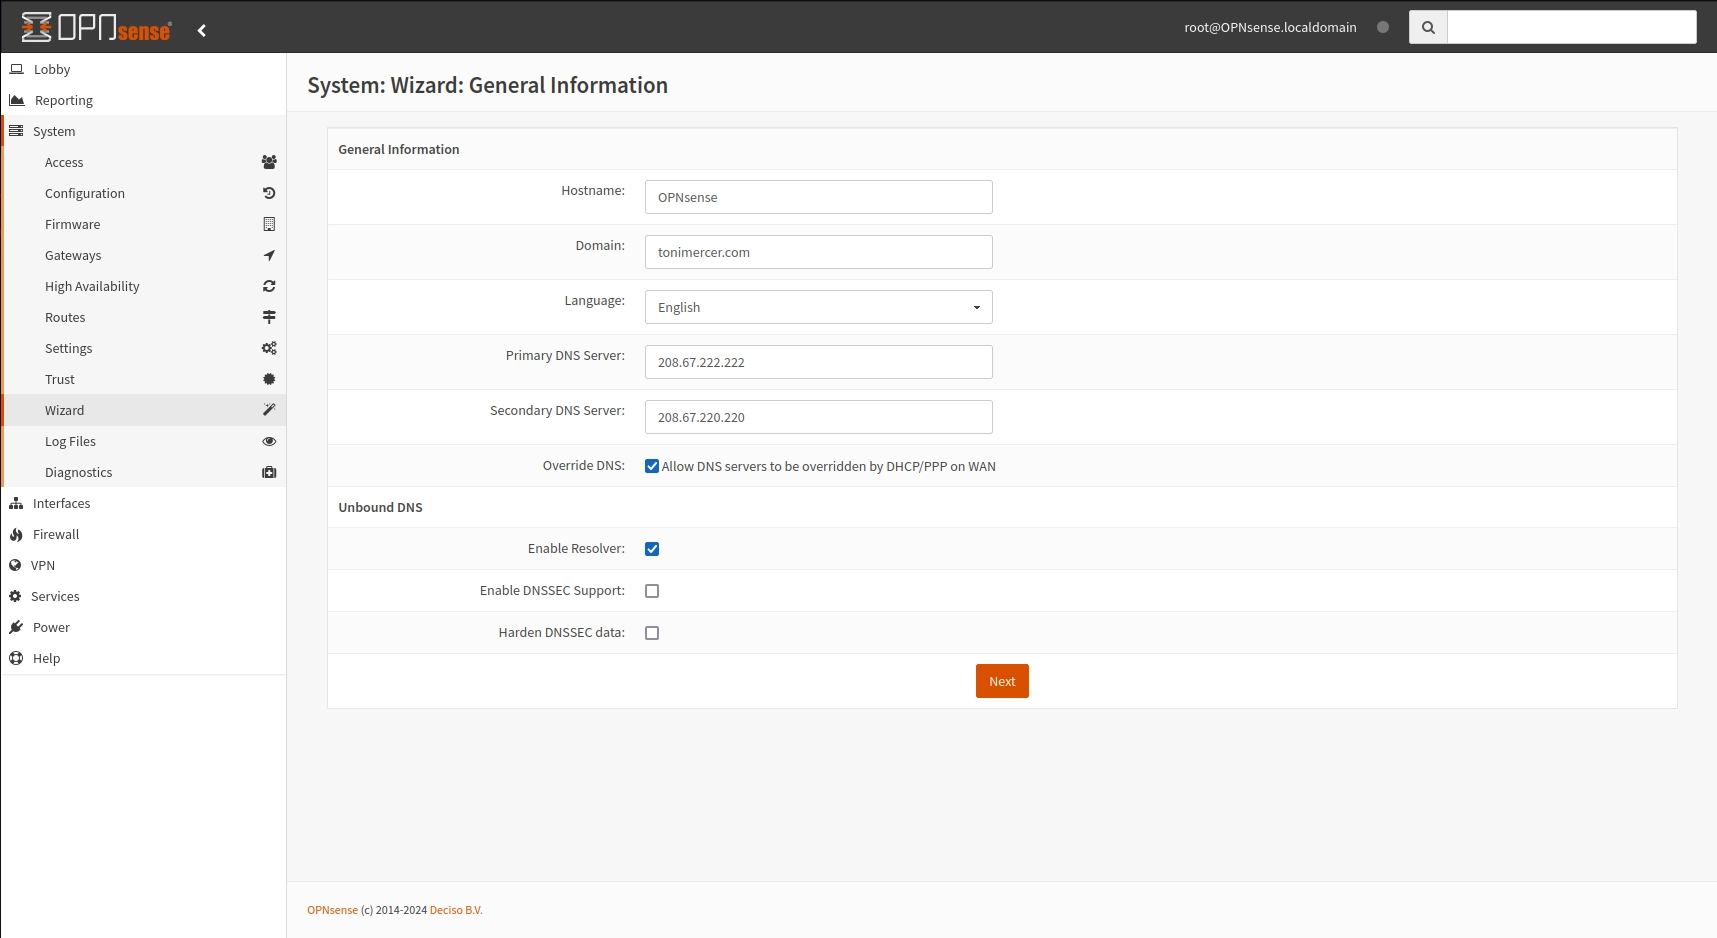
OPNsense wizard - general information
Leave the time-server hostname and timezone as they are filled and move to the next screen.
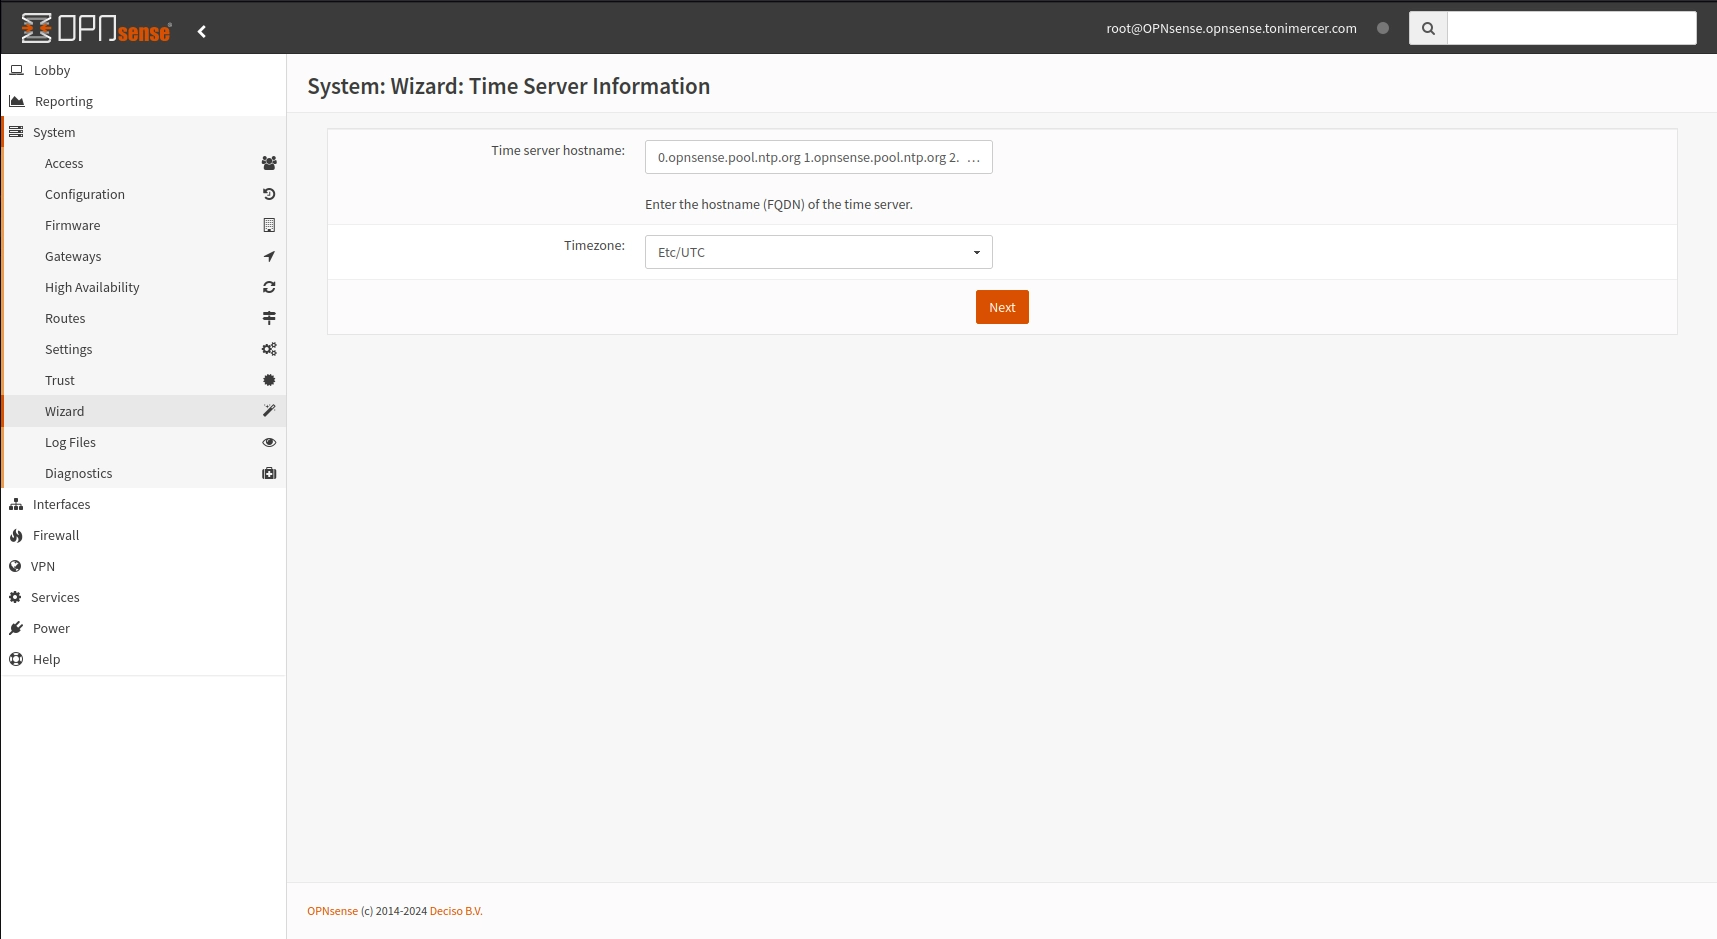
OPNsense wizard - time-server information
As there is a DHCP server enabled on the ISP router there is no change on this screen.
Note:
The router of your ISP could be replaced as long as your ISP is willing to provide you the authentication method to their network. Some ISP may be more open than others to share you such information or even help you configure the router.
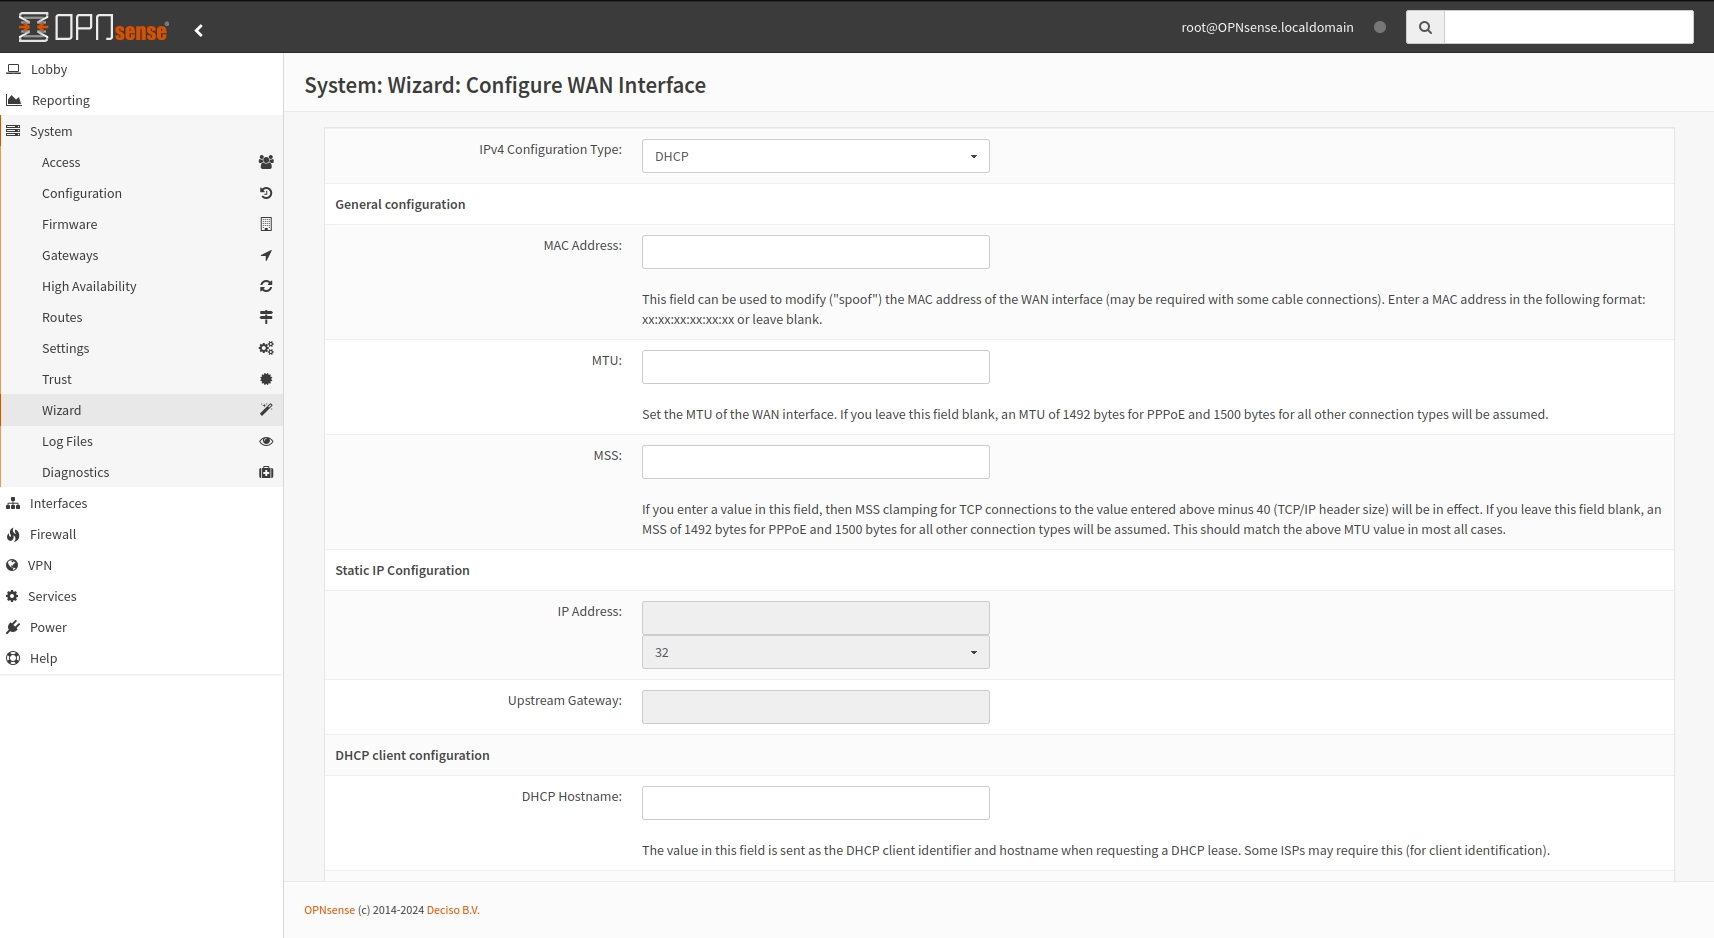
OPNsense wizard - WAN setup
For the LAN setup we will change the subnet to 10.0.1.0/8 and assign to the router the ip 10.0.1.1
Note:
Stick to 24 as subnet mask if you don't know how netmask works.
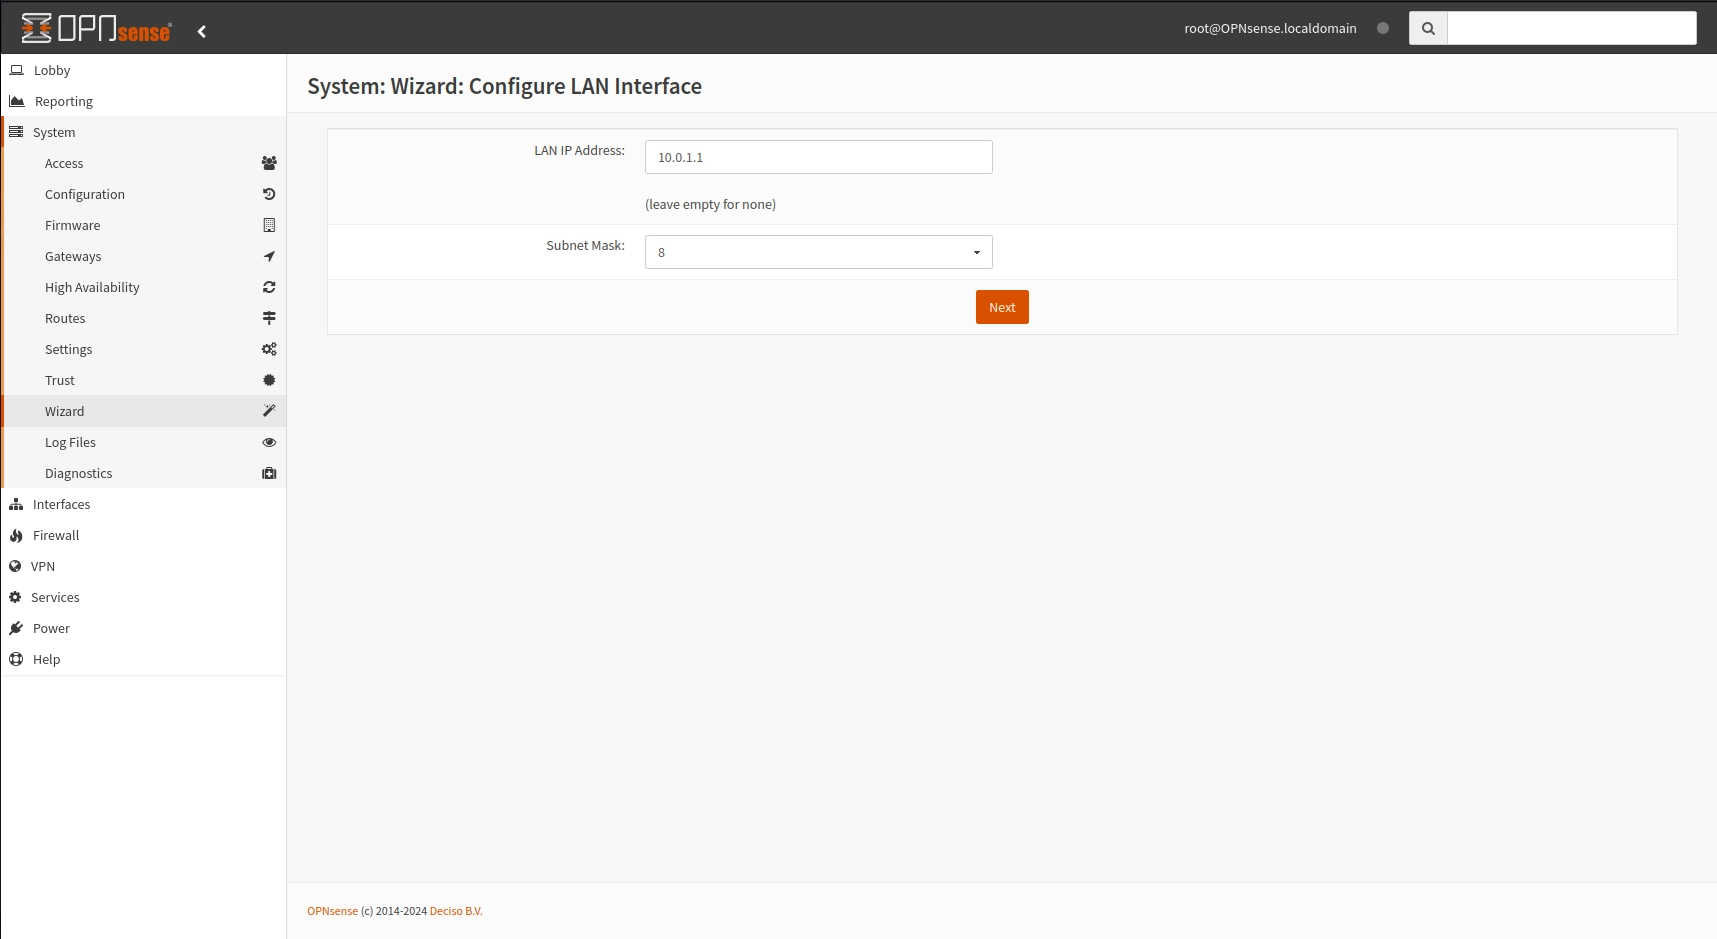
OPNsense wizard - LAN setup
Now the firewall will set the configuration accordingly and restart the necessary processes.
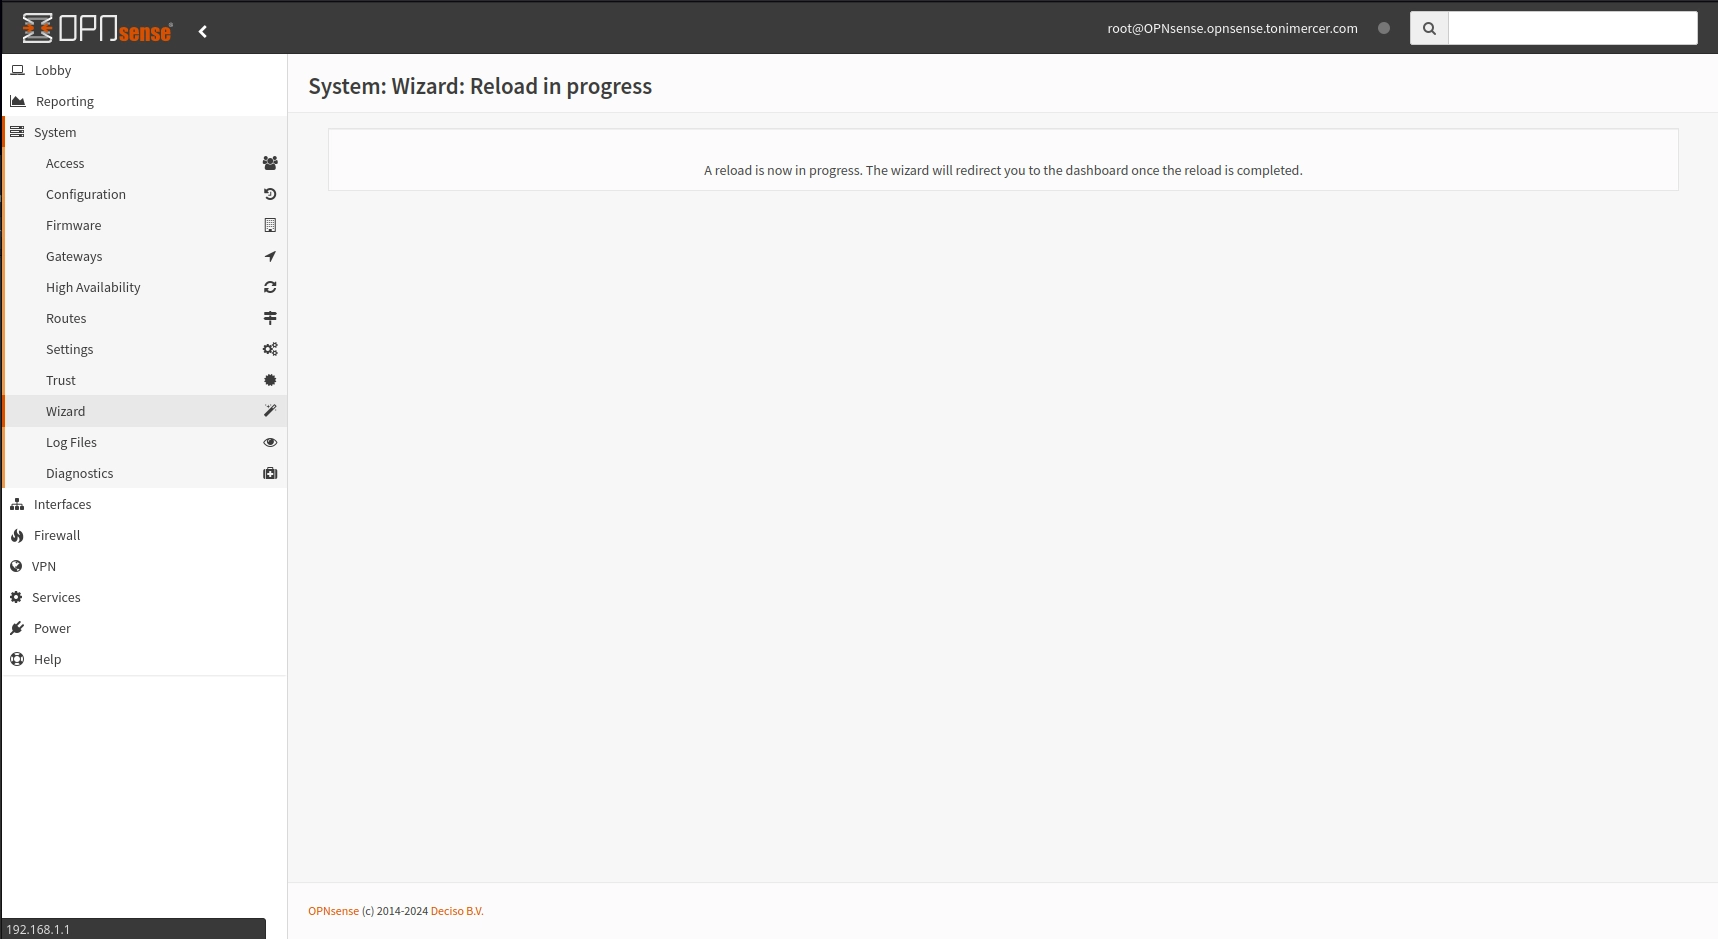
OPNsense wizard - restart
Finally, a network adapter restart is necessary to get the new subnet ip from the DHCP. To access the router now use https://10.0.1.1 url
On the Proxmox console the LAN now has the correct subnet.
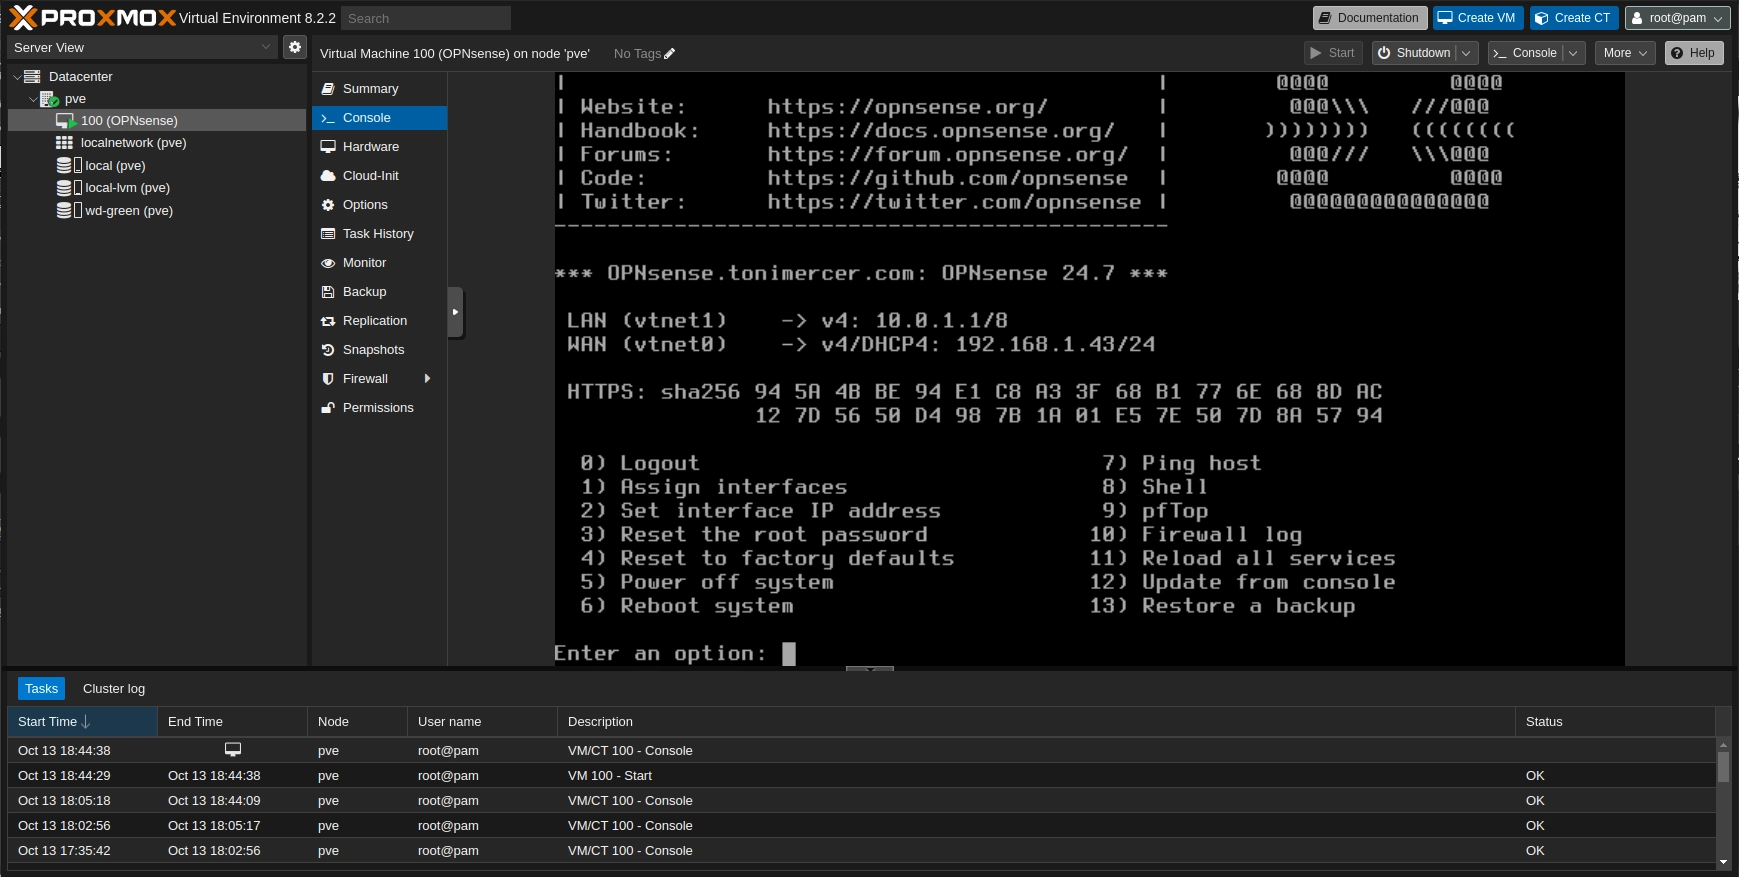
OPNsense wizard - VM confirmation
Now, you can start adding VMs and set the OPNsense LAN adapter as their network adapter.
Note:
This current setup allows the VMs that are serving the webpage to load the OPNsense GUI. If you don't add a third interface for isolated management make sure you do not allow those VMs to access the GUI.
OPNsense third interface for management on Proxmox management subnet
On this section we will add ProxmoxVe management interface to OPNsense firewall. This will enable the monitoring of the firewall without having to plug the computer in a specific ethernet port. Additionally, it will disable the VMs of accessing the firewall in case they get compromised.
This is a quite tricky step because by default OPNsense listens at all interfaces but the anti-lockout rules are applied to LAN.
Disable the DHCP on the LAN interface. Go to Services > ISC DHCPv4 > [LAN] and uncheck the Enable tick.
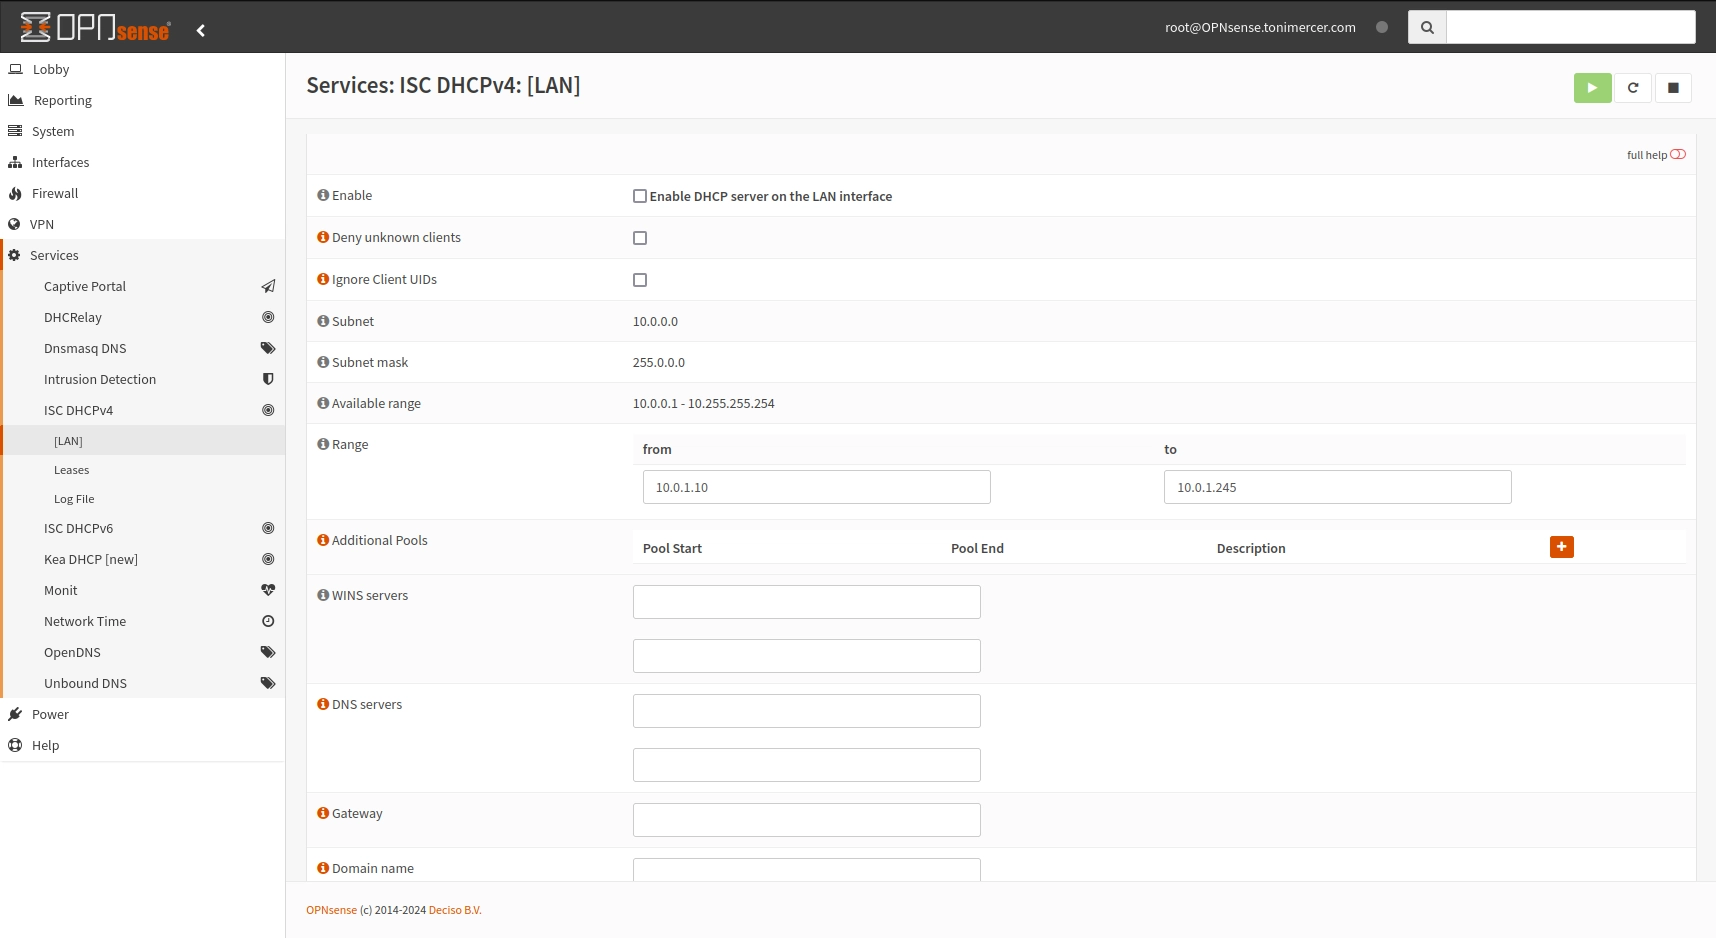
OPNsense - Services > ISC DHCPv4 > [LAN]
Add the vmbr0 network to the OPNsense vm.
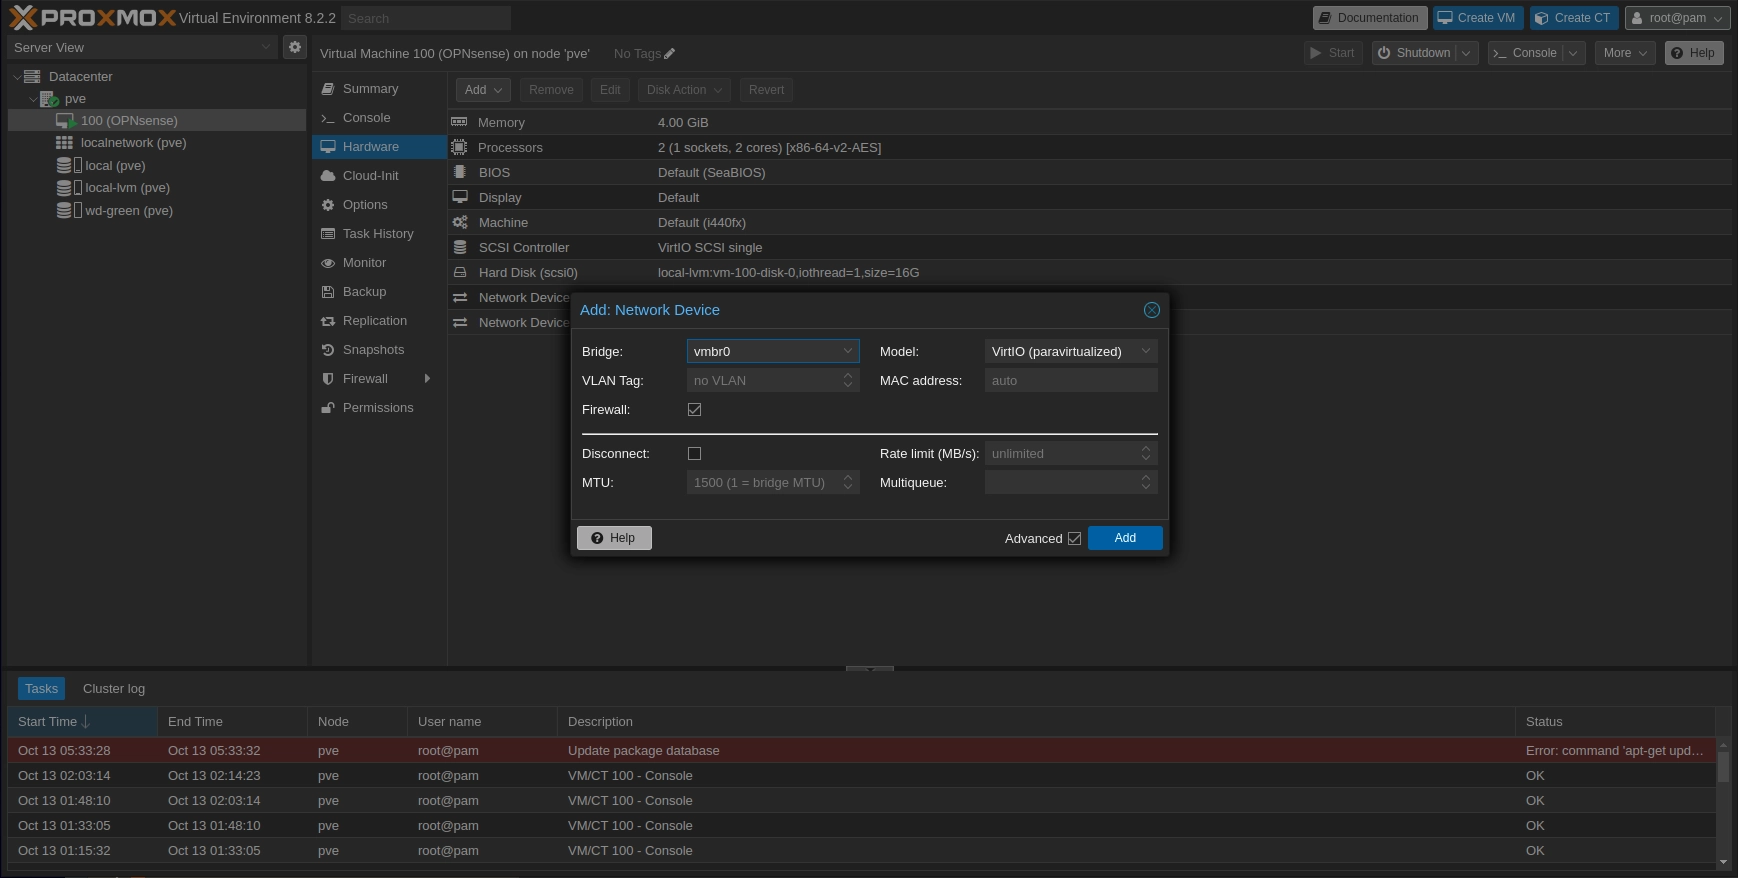
Proxmox hardware page
From the OPNsense GUI go to Interfaces > Assignments and add the newly added interface. Add a comment indicating is the new LAN for VMs interface. I used VMs_LAN
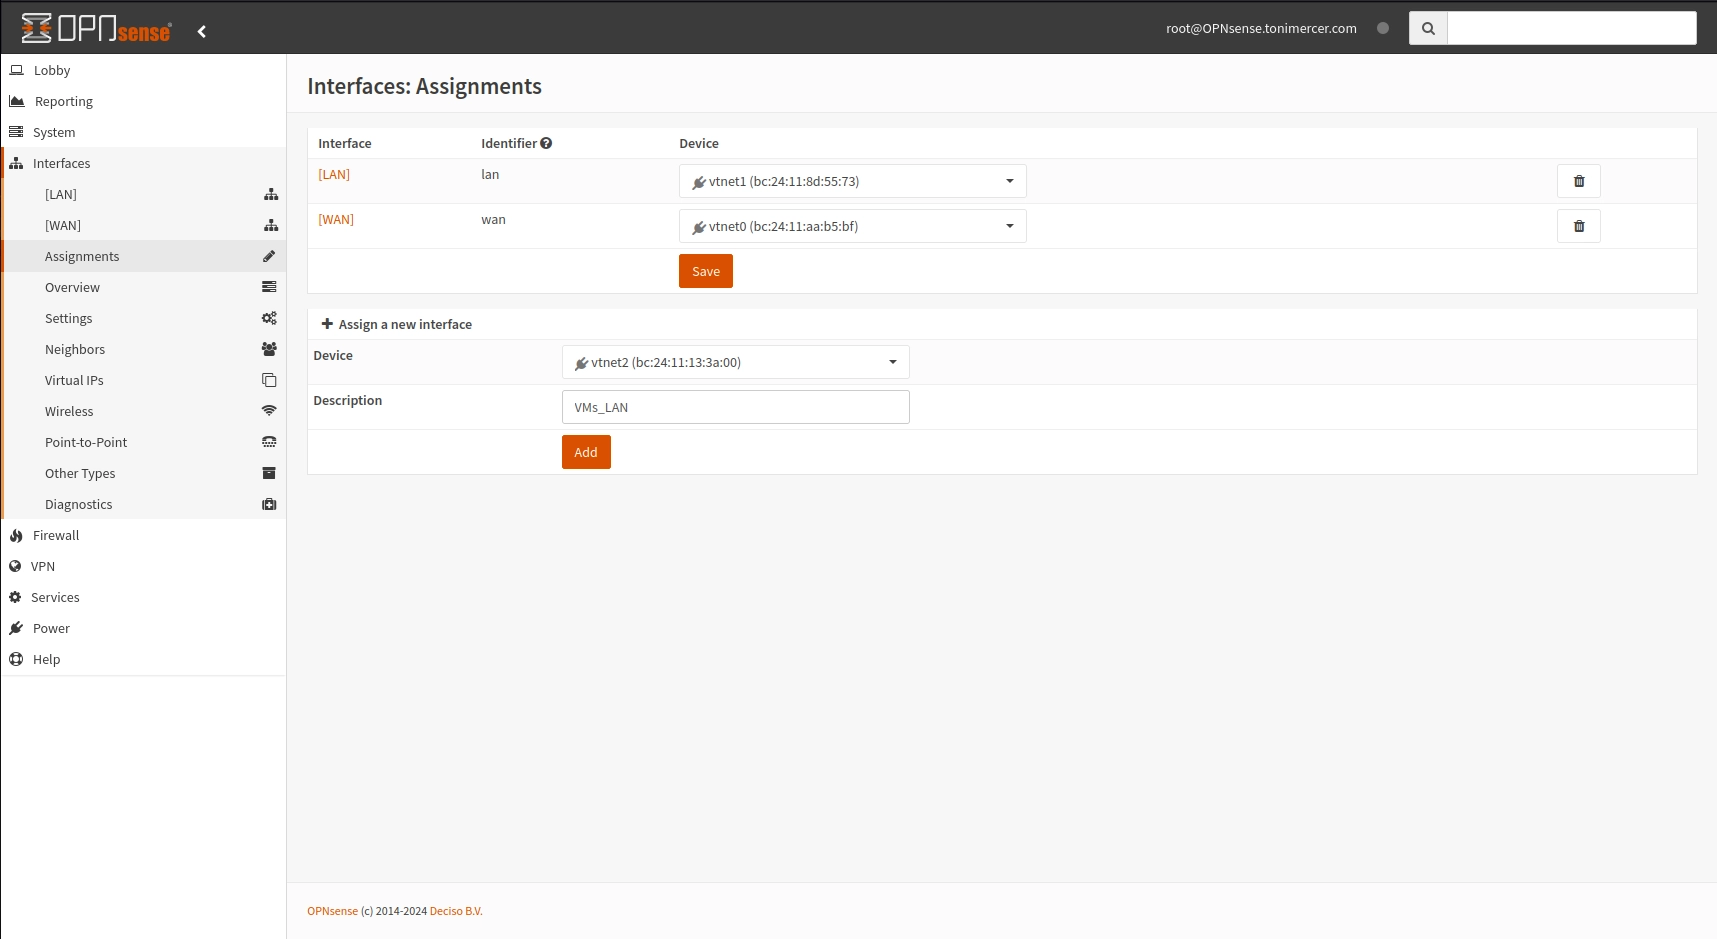
OPNsense Interfaces: Assignments
On OPNsense go to Interfaces > [LAN]. Check Prevent interface removal, and on IPV4 Configuration type select DHCP. Save and apply the changes. Now the LAN is waiting to get a DHCP IP. Now on the PVE console you need to reassign the interfaces.
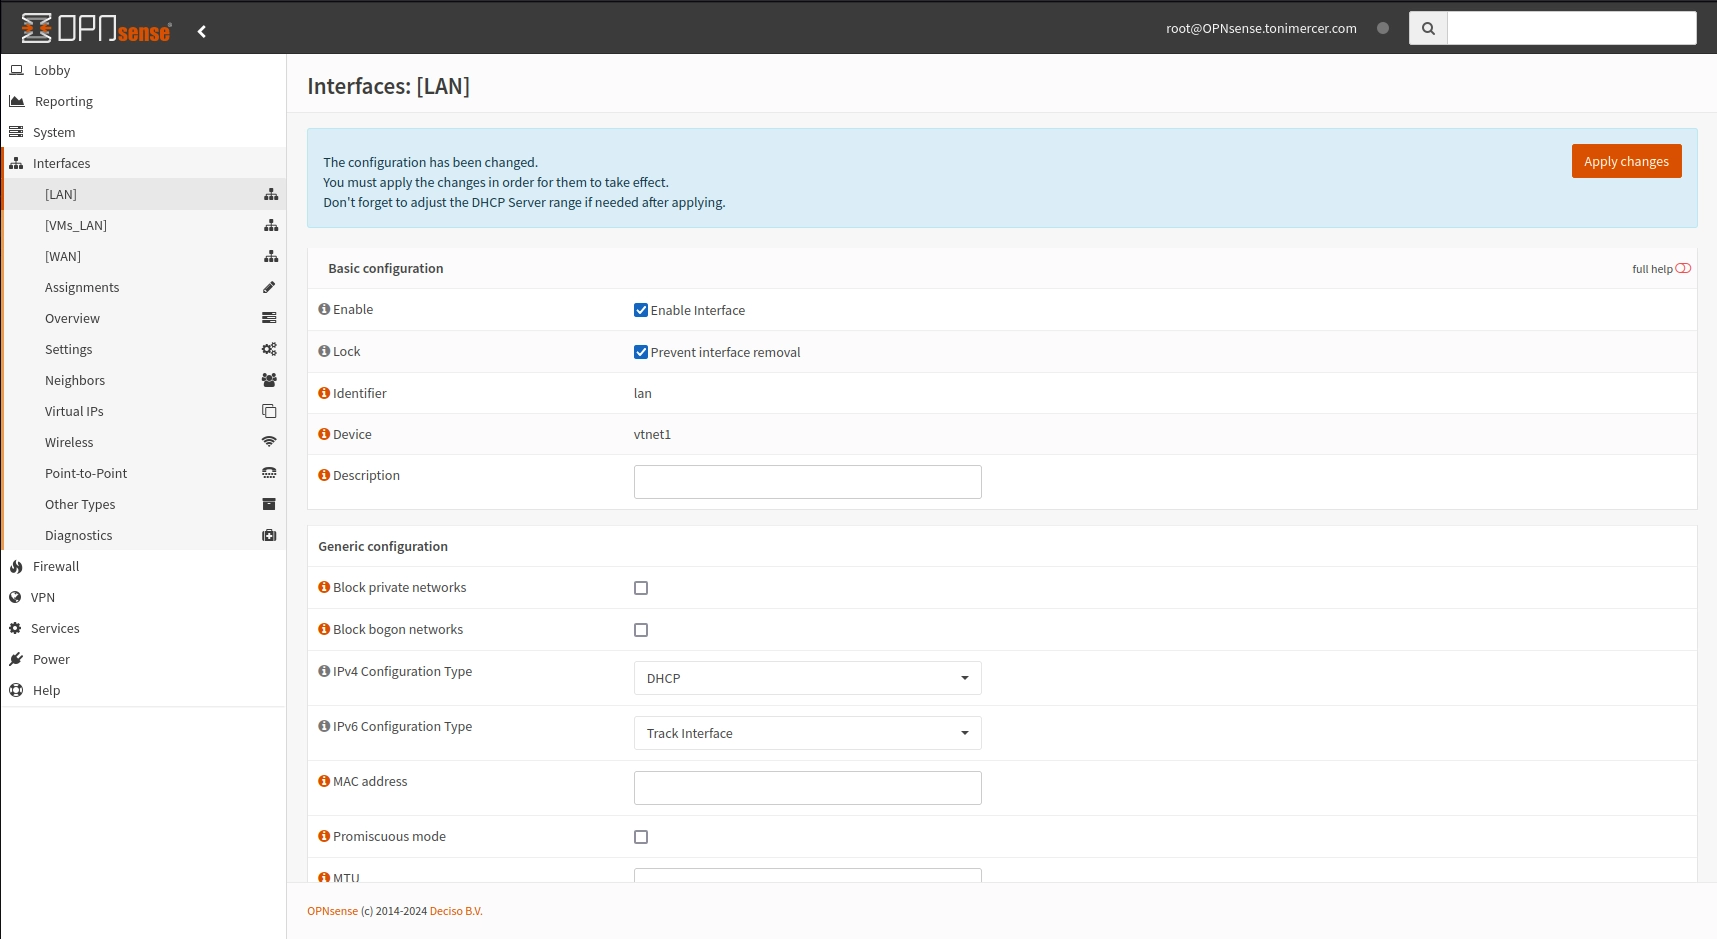
OPNsense Interfaces: [LAN]
To reassign the interfaces login with the root user and press 1. Skip with n the LAGGs and VLANs configs. Fill the interface name for WAN, LAN, and OTP1. This time you have to switch the Proxmox Linux Bridge for management vmbr0 with OPNsense LAN interface.
As the lan is expecting for an IP from the DHCP the management router will allocate an IP for the LAN and the VMs_LAN interface will become the interface for the VMs. This allows us to control the firewall from the LAN.
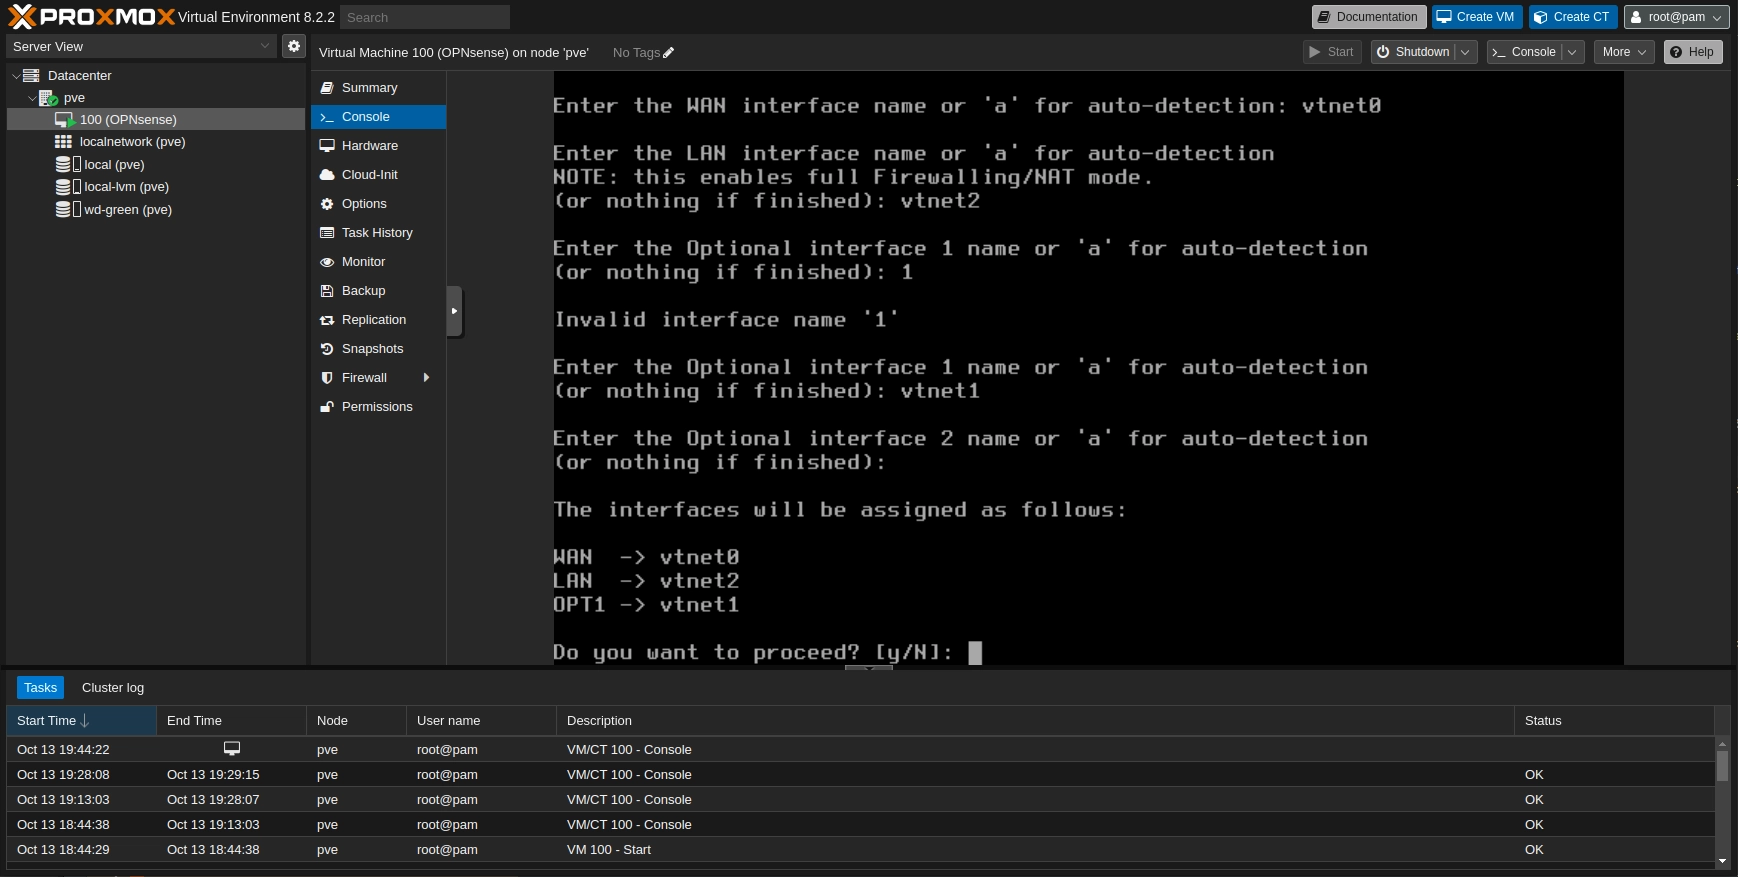
Proxmox: OPNsense: Console
To login now you have to reconnect your computer to the management subnet. On the console of Proxmox your new assigned IP for the LAN should be displayed. If it does not get an IP directly restart the services using the option 11.
Now go to Interfaces > [VMs_LAN]. Enable and check Prevent interface removal, and on IPV4 Configuration type select Static IPv4. Scroll down a bit and on IPv4 address fill the field with 10.0.1.1 and 24 for the mask. Save the changes and apply the configuration.
Apply the changes after saving the configuration.
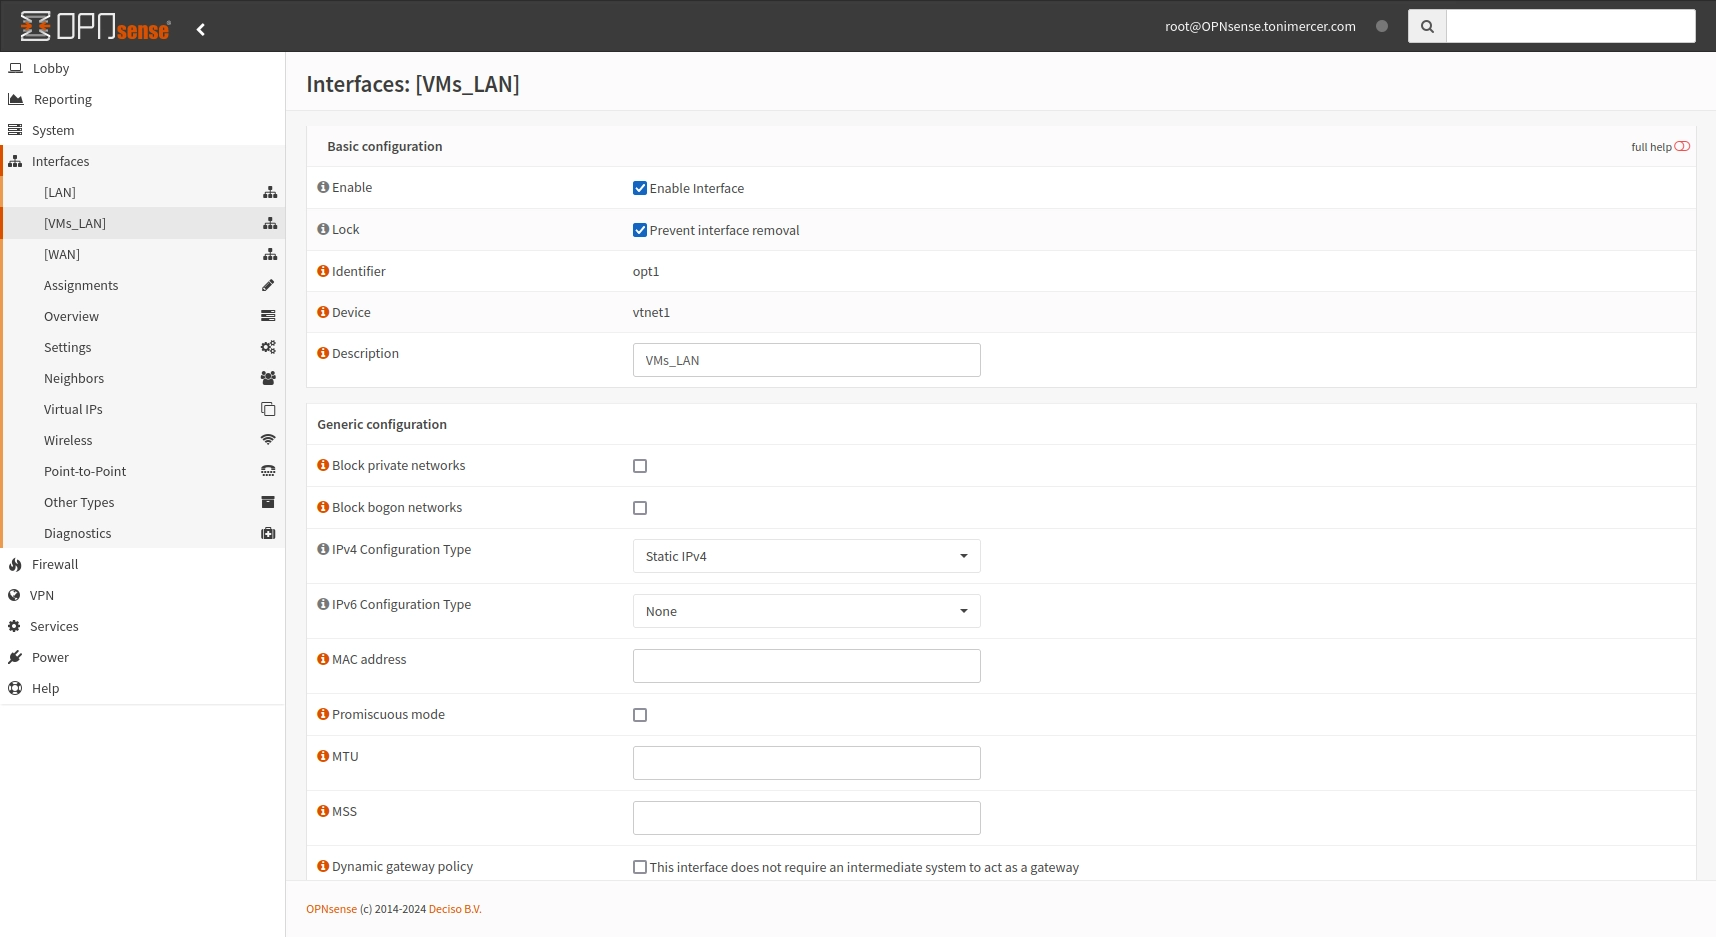
OPNsense Interfaces: [VMs_LAN]
Now we have to enable the DHCP in the VMs_LAN subnet if we don't want to configure each IP statically for each VM.
Go to Services > ISC DHCPv4 > [VMs_LAN] check Enable and fill the range according to your needs.
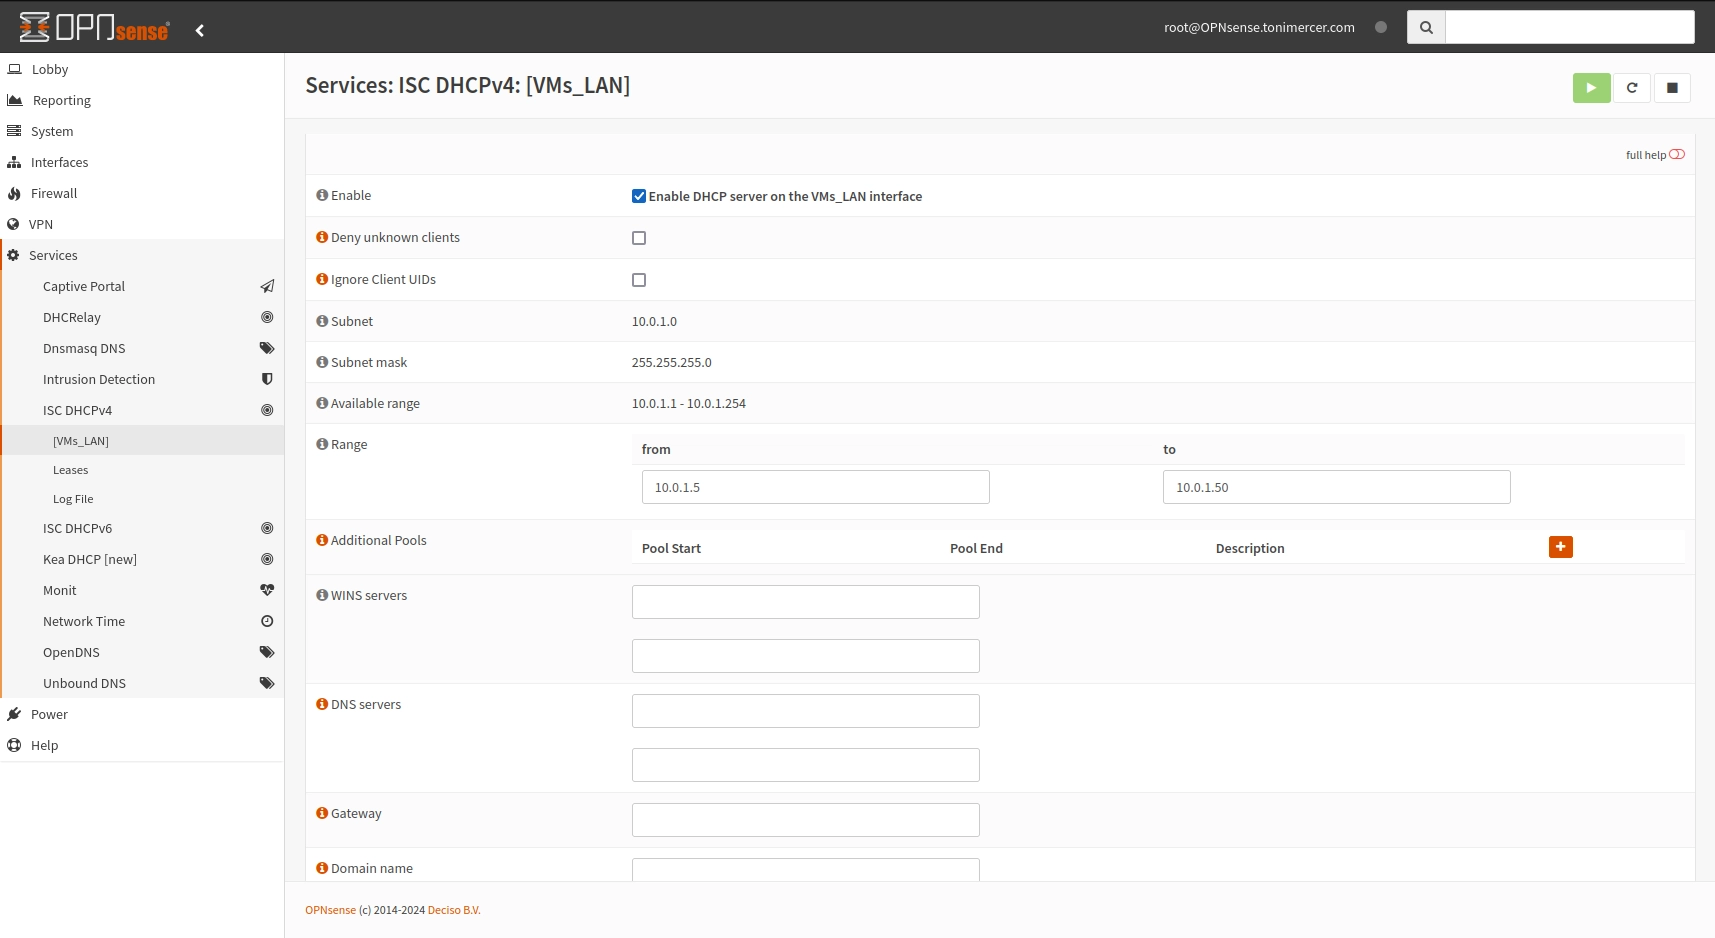
OPNsense Services: ISC DHCPv4: [VMs_LAN]
Reboot the router.
While trying to find ways to isolate OPNsense GUI on an interface I found that using OPX instead of LAN interface proved to be problematic.
The Interface swap feels like is not the appropriate way to do it, but it does the job.
We still need to add several firewall rules to allow the VMs to reach the public domain but protect the firewall GUI from internal VMs access.
Go to Firewall > Rules > VMs_LAN and press the + button
| Protocol | Source | Description |
| IPv4+6 TCP/UDP | VMs_LAN net |
Allow DNS queries
92edd3440d2e8d0084491c2572d3a0a7
|
| IPv4+6 UDP | VMs_LAN net |
Allow NTP queries
53d1e8b736007b6f352bc477ddde8f84
|
| IPv4+6 ICMP | VMs_LAN net |
Allow ICMP to the firewall
9df5b694d04707472ffeef50a7dd5fda
|
| IPv4+6 * | VMs_LAN net |
Route all traffic not pointing to the firewall
9d2b95065ac99a8791a2f0fe64831c1f
|
Note:
On the last rule check the ! You have to enable Use this option to invert the sense of the match. on the destination.
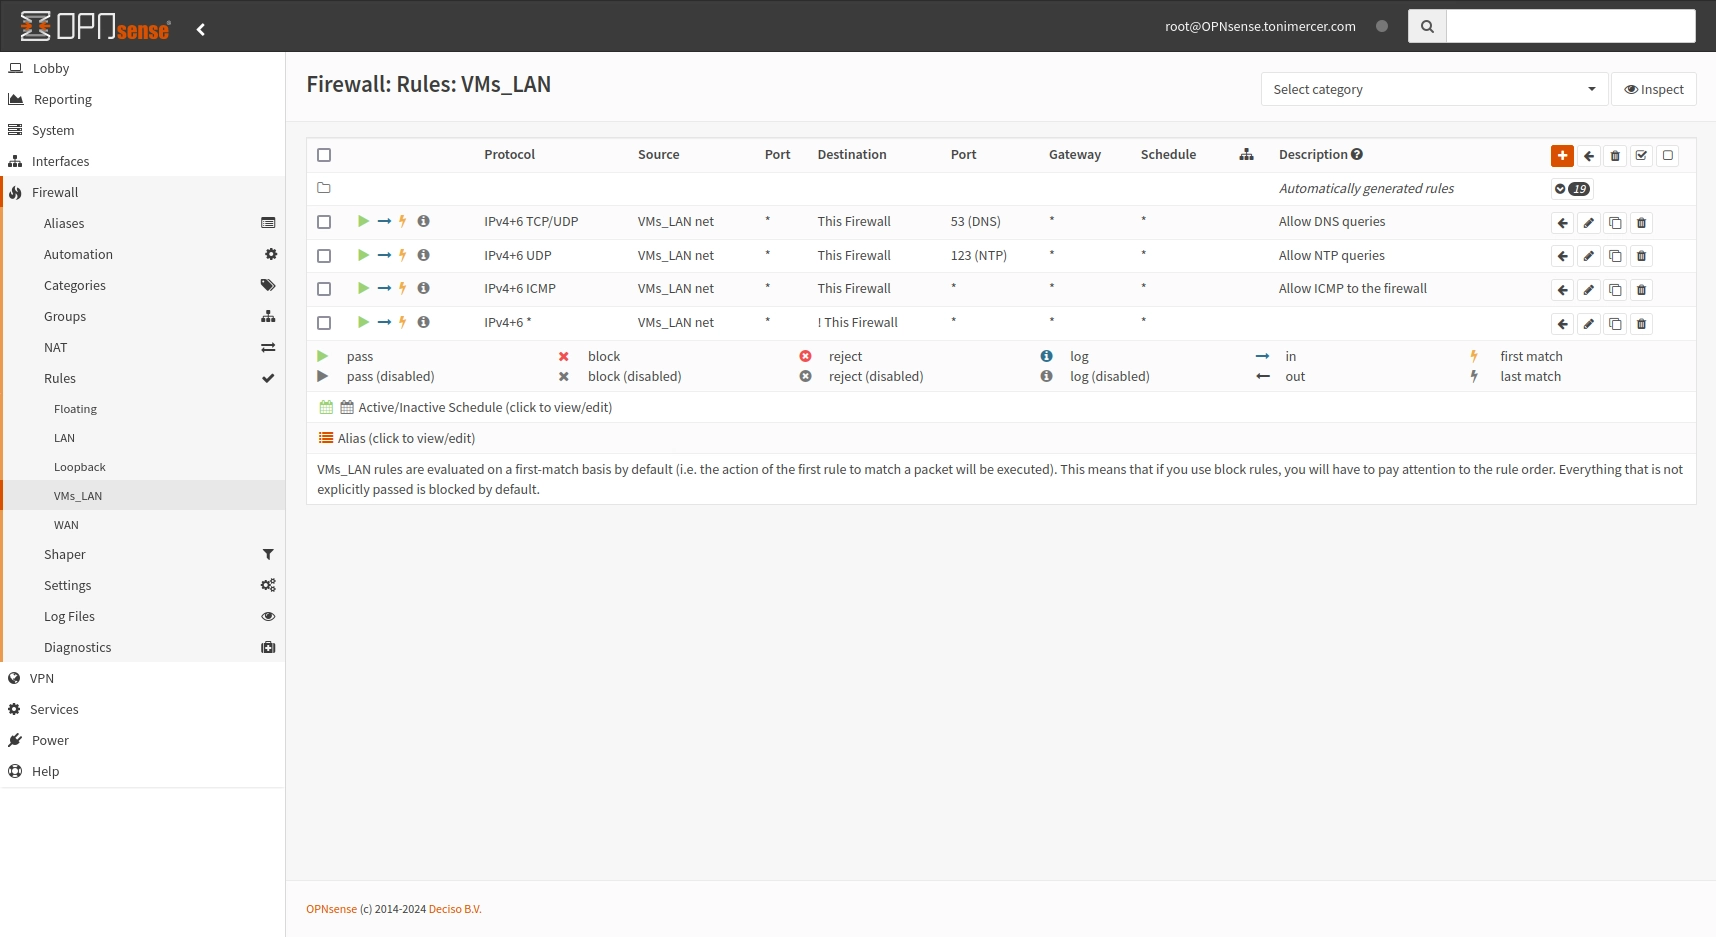
OPNsense Firewall: Rules: VMs_LAN
After this rules the VMs will be able to resolve the DNS queries and access the public domain. Ping to the firewall has been added for debugging purposes and NTP queries have been allowed aswell. All the rest connection have been rejected on the last rule by allowing everything not targeting the router.
Now we can start creating the VMs, but they are not yet protected under suricata. Follow the next steps to enable suricata and protect the VMs
Enable and configure suricata
On this section suricata will be configured to protect the underlying VMs. You can enable suricata on Services > Intrusion Detection > Administration
Enable the service and I would recommend not enabling IPS mode after having reviewed some days of logs. If you have no traffic like this webpage you can go enable it but there is a good change you break some service. It will also depend on the quantity of the rules you enable.
On pattern method select Hyperscan, on interfaces select VMs_LAN and leave the logs Weekly.
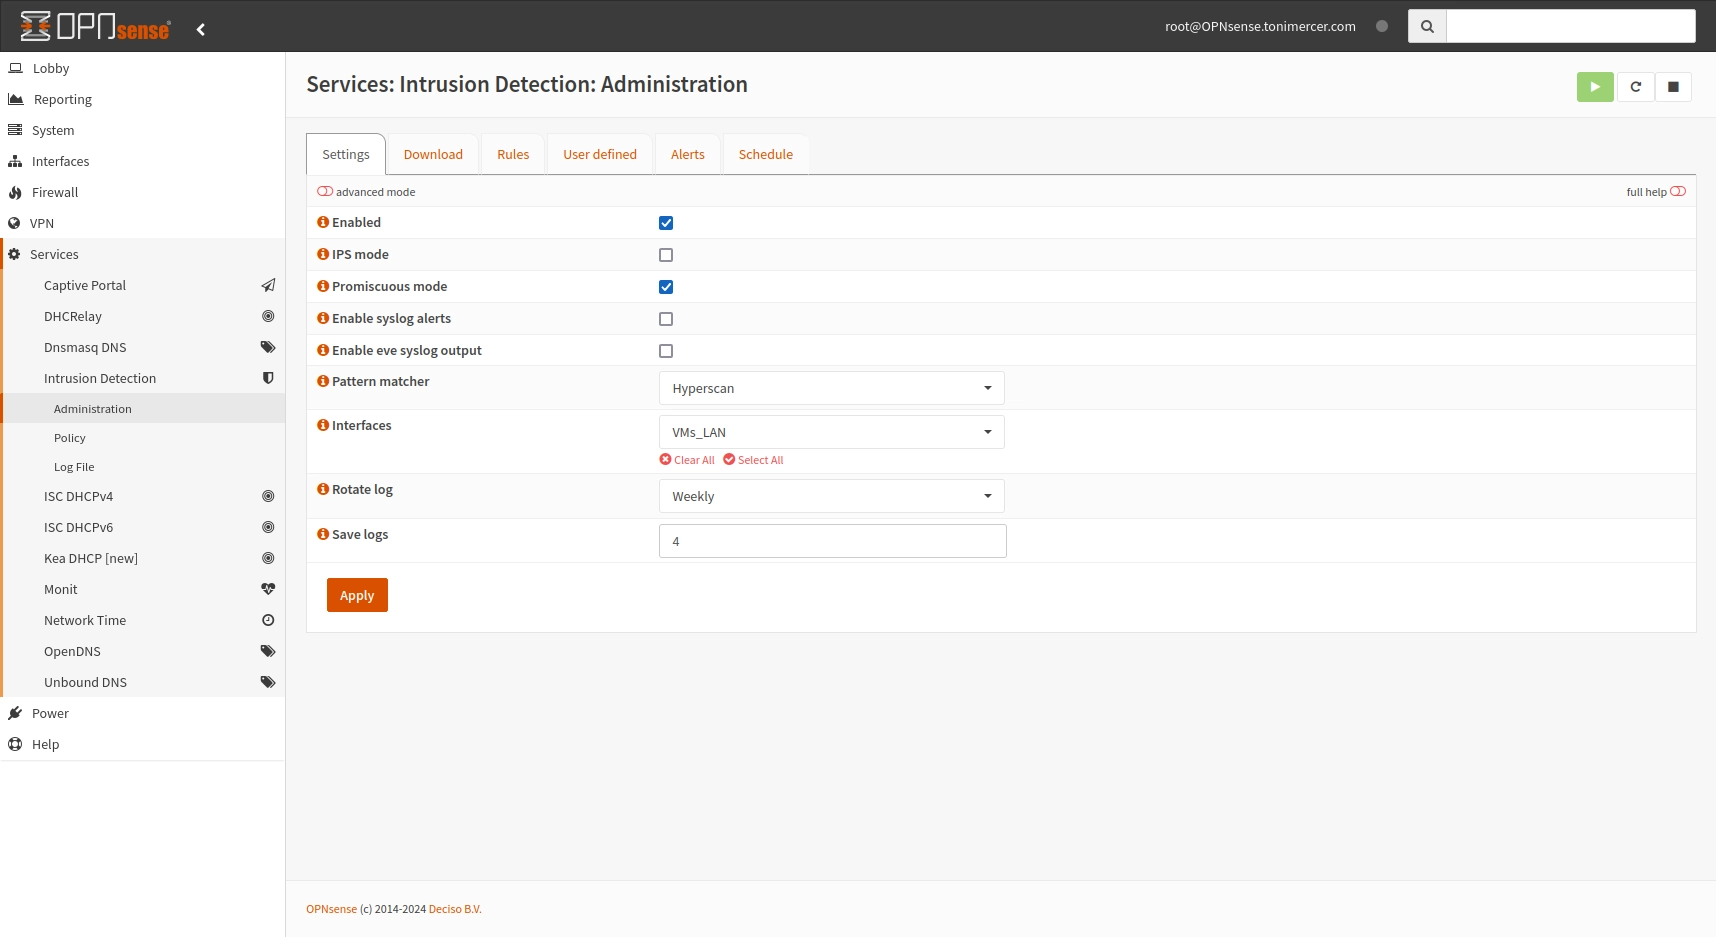
OPNsense - Services: Intrusion Detection: Administration
Now proceed downloading the rulesets by going to the Download tab, select everything and press Enable selected then once enabled press Download & Update Rules.
This does not mean that those rules are being applied. They are only downloaded into the firewall.
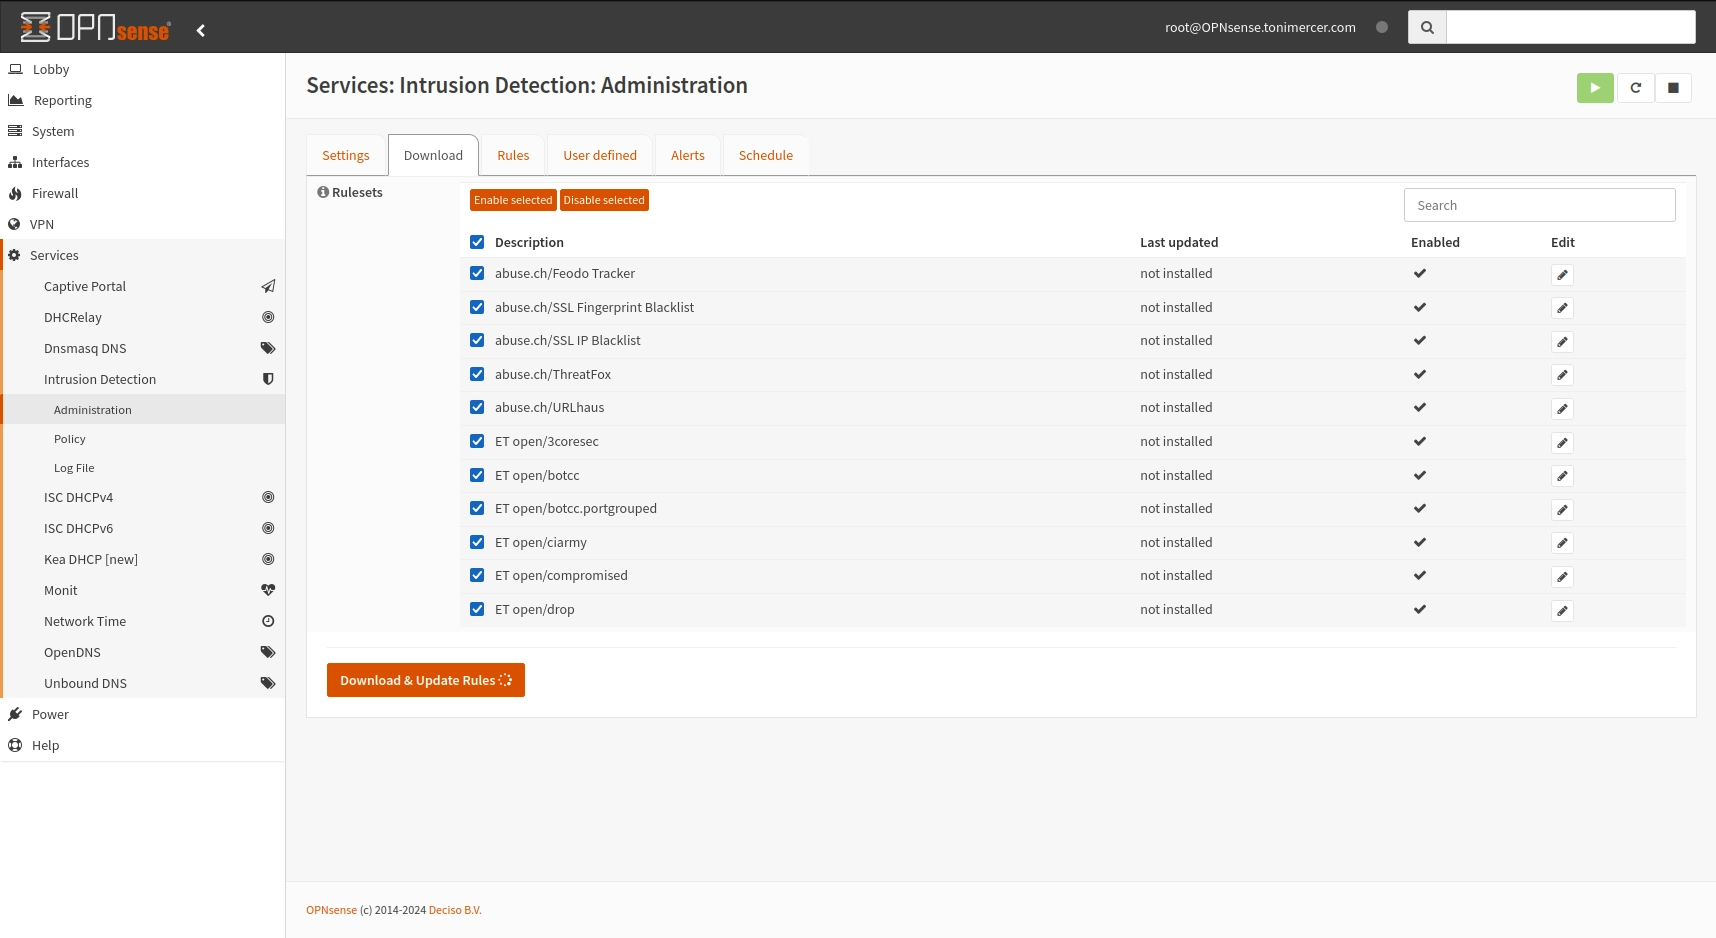
OPNsense - Services: Intrusion Detection: Administration
To enable the rules we will create a policy. Go to Services > Intrusion Detection > Policy and press the + button.
On Rulesets select the ruleset that you want to enforce. For example, I selected dos, exploit, malware, ftp, sql, pop3, rpc, shellcode, smtp, tftp, telnet but this will vary on your needs.
On New Action, Drop has been selected for now. Unless IPS mode is enabled these rules won't actually drop packets.
On Description add a comment to help you better identify the ruleset triggering the drop
Don't forget to press apply once the ruleset has been created.
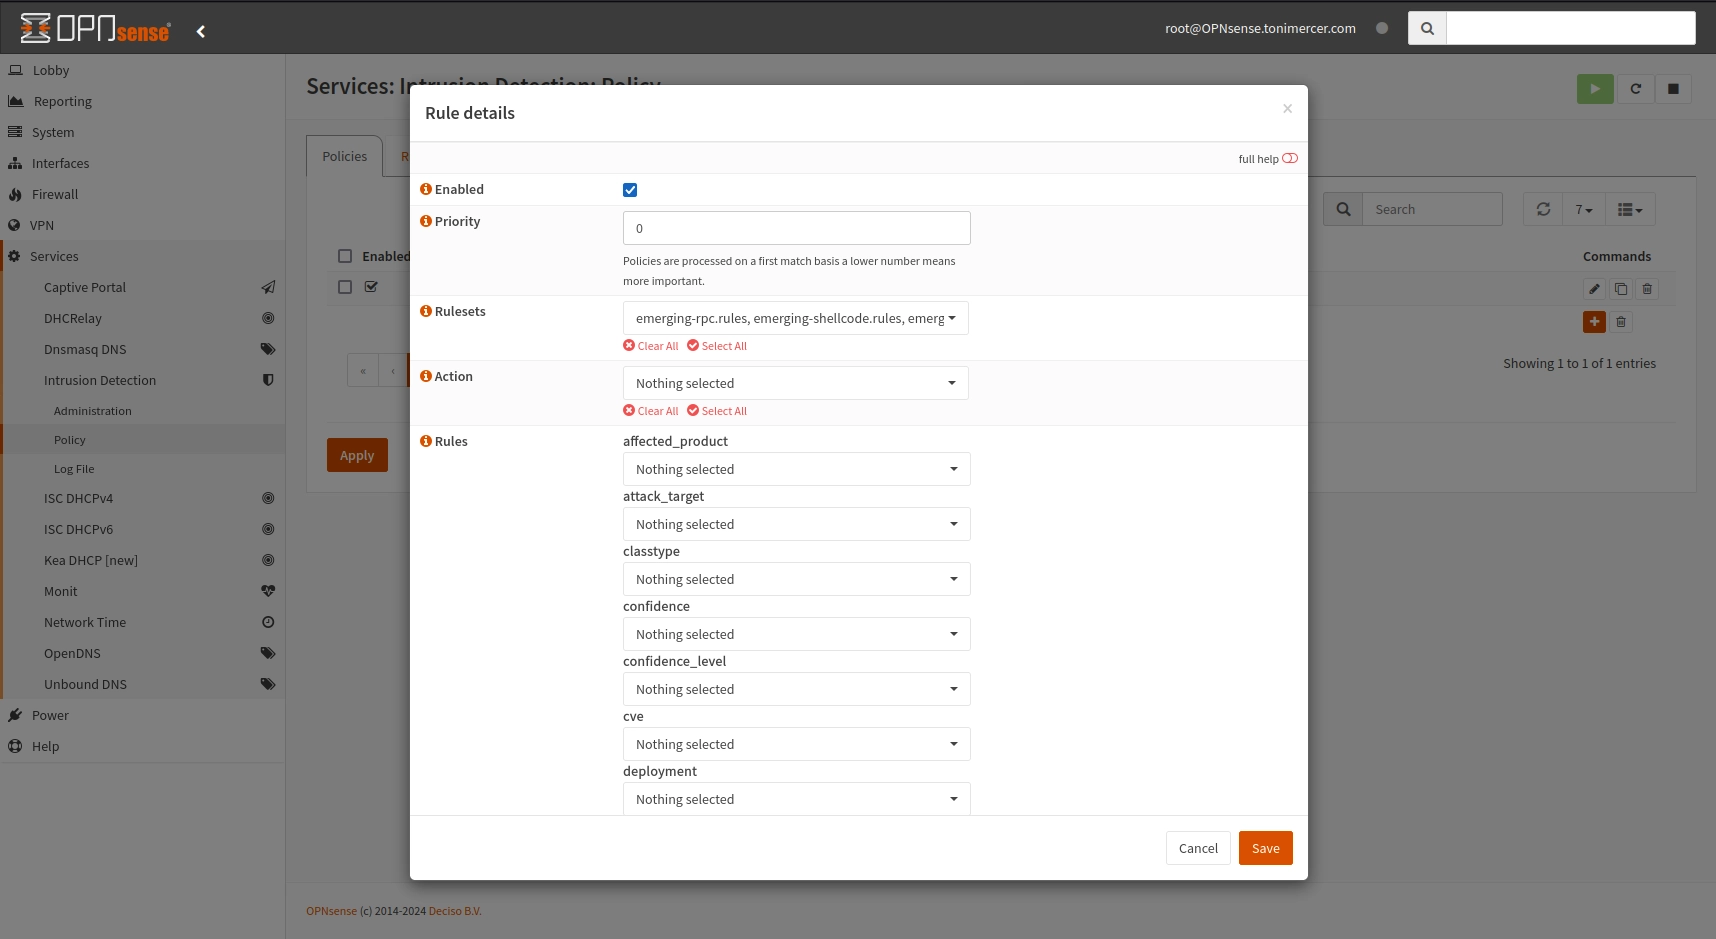
OPNsense - Services: Intrusion Detection: Policy
Go to Schedule tab and enable the schedule. This will keep the rules updated daily.
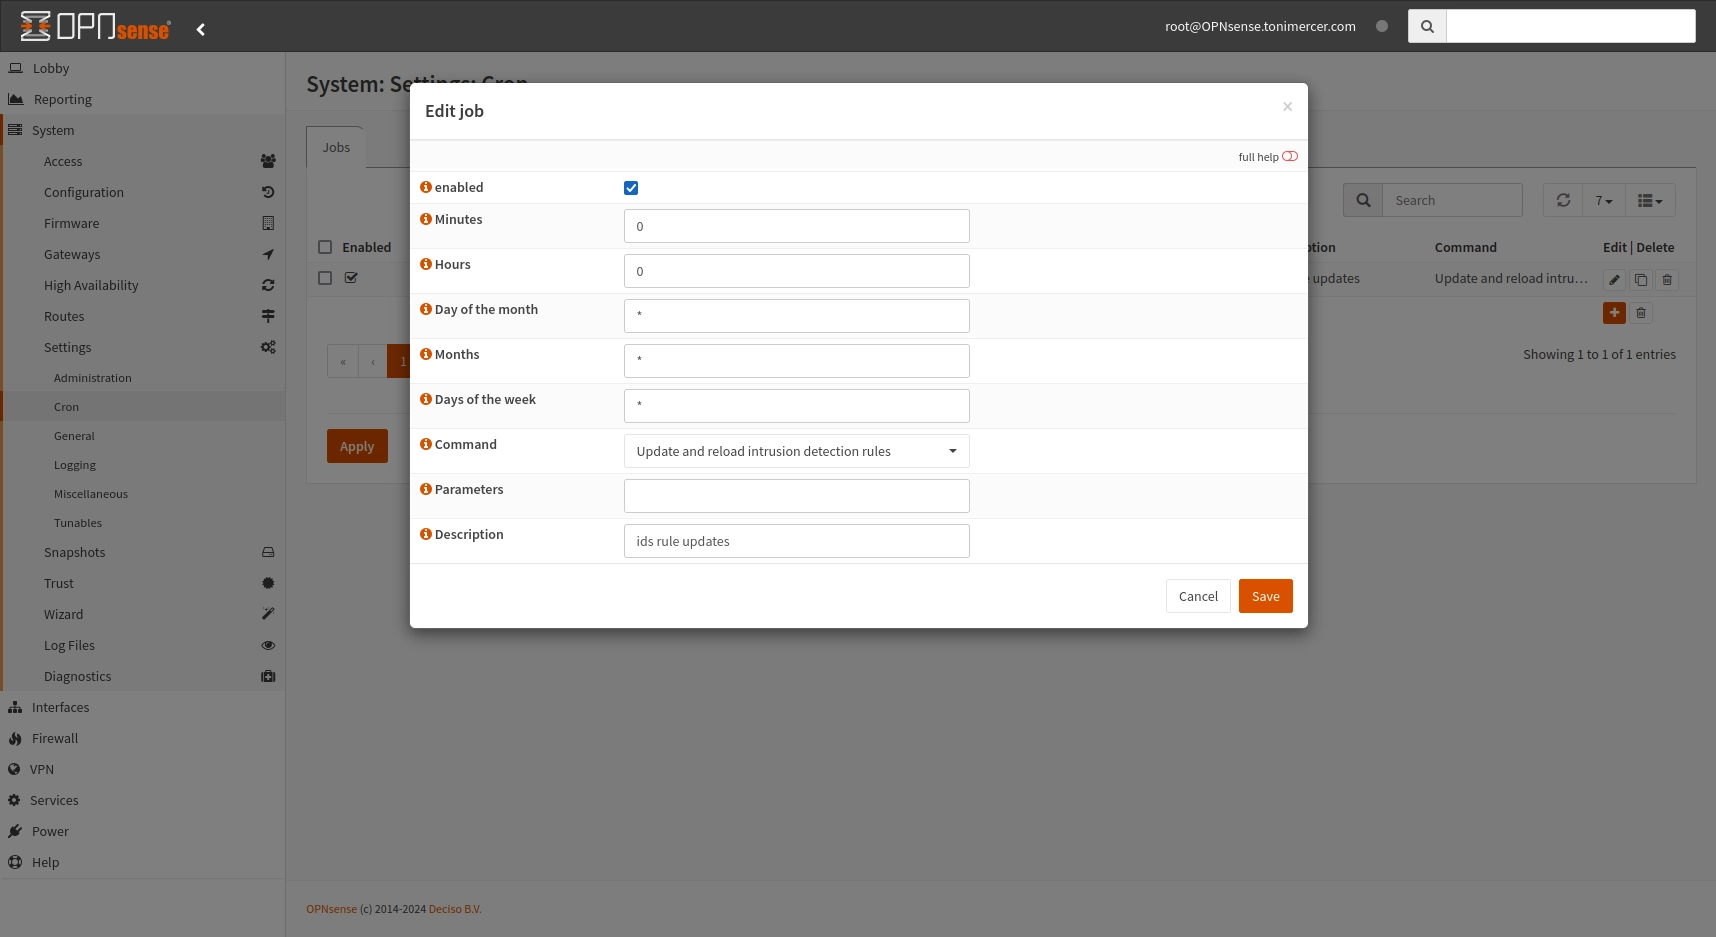
OPNsense - Services: Intrusion Detection: Edit job
Now is just watch the logs from time to time and disable the false positives. Once you feel confortable with the logs you can activate IPS mode and those drops will take effect.
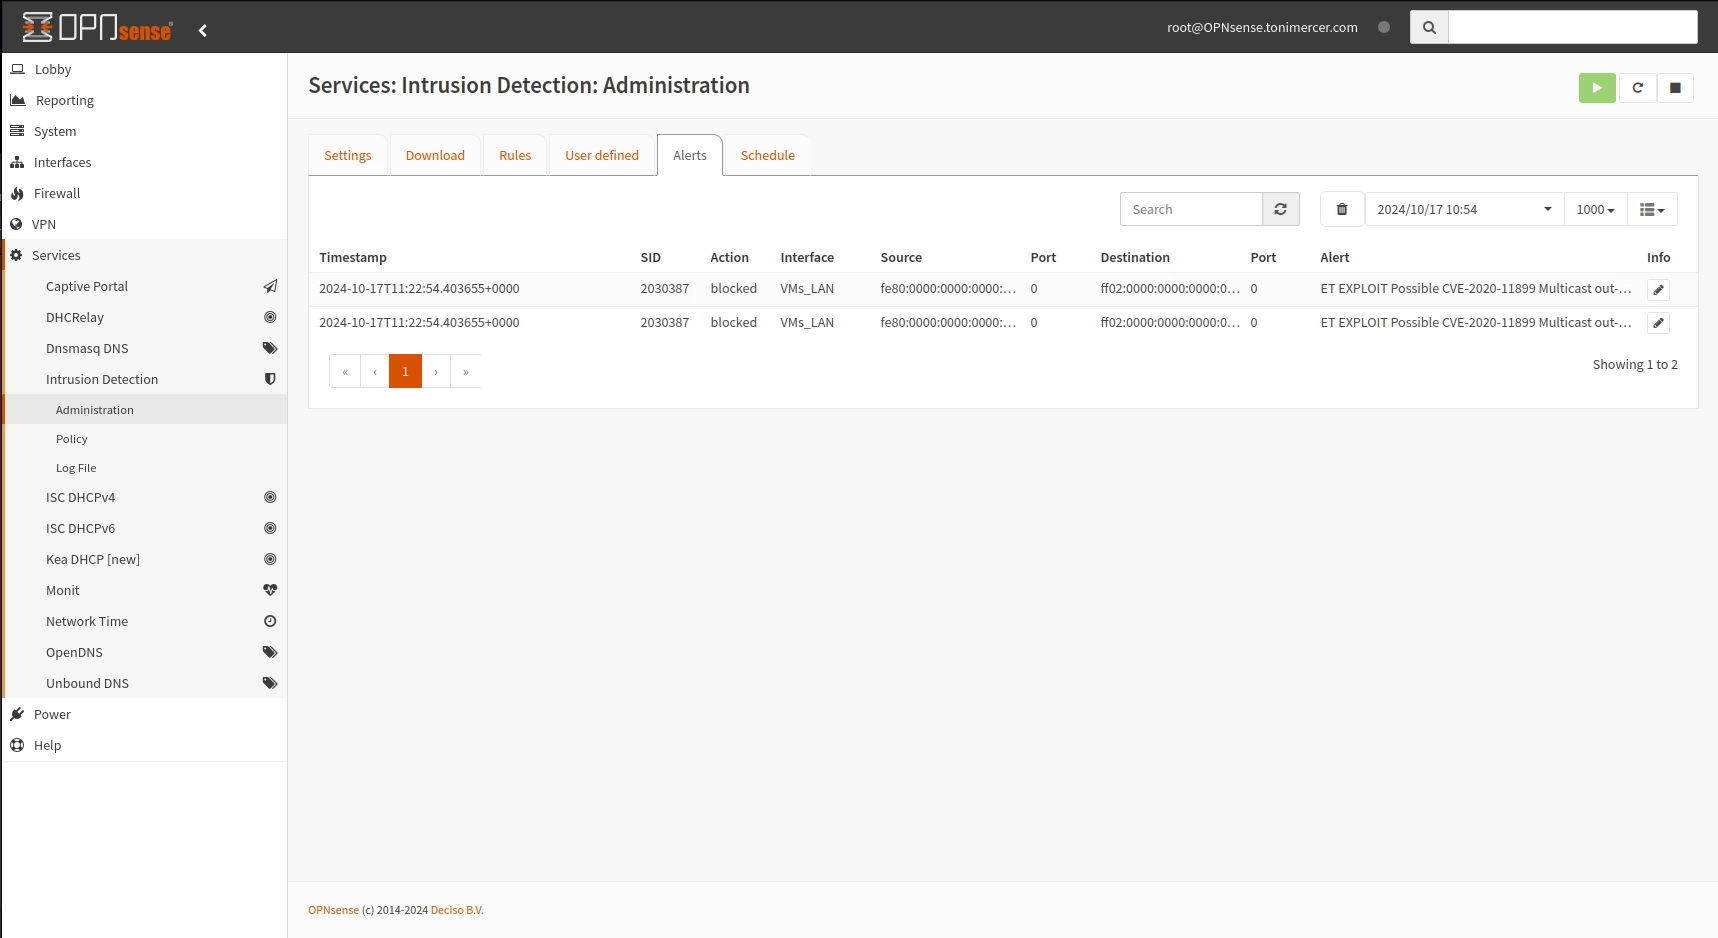
OPNsense - Services: Intrusion Detection: Administration
If you spot any typos, have questions, or need assistance with the build, feel free to contact me at: antonimercer@lthjournal.com
This guide contains no affiliate links or ads. If you'd like to support this or future projects, you can do so here:
By supporting monthly you will help me create awesome guides and improve current ones.
Technologies used
Proxmox VE, Debian 12, OPNsense, suricata, nginx