OPNsense, Isolated management interface
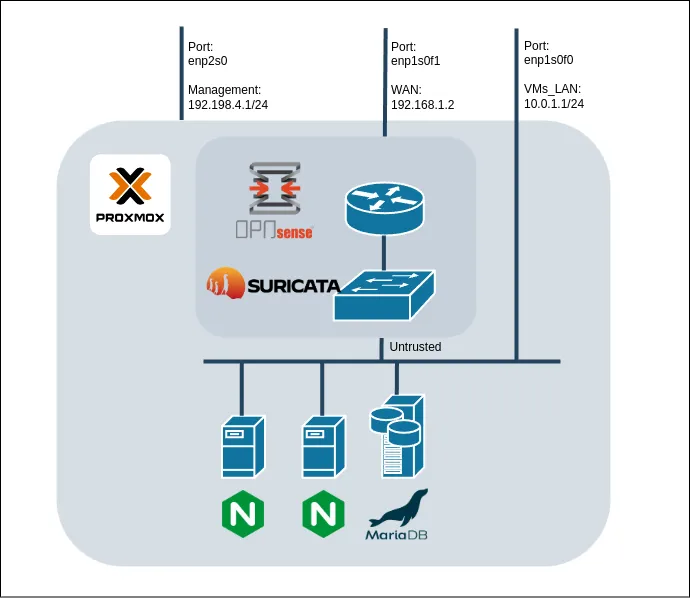
After installing OPNsense to a VM I struggled to find a way to expose the GUI isolated on an interface. The solution that ended working was to dedicate the LAN for management and use the OPT interfaces for subnets. For some reason the settings to change GUI listening interface does not work as expected and most of the comments online suggest rather than using that option to use firewall rules instead.
This felt a bit weird but, it did the job.
If you spot any typos, have questions, or need assistance with the build, feel free to contact me at: antonimercer@lthjournal.com
This guide contains no affiliate links or ads. If you'd like to support this or future projects, you can do so here:
By supporting monthly you will help me create awesome guides and improve current ones.
After this brief introduction about the reasons of the setup, let's start with the guide.
OPNsense configuration wizard
OPNsense LAN is by default at the subnet 192.168.1.0/24 therefore you will be provided an IP from that range. After connecting a wire to the LAN port, write https://192.168.1.1/ in the browser.
This first time that OPNsense GUI is accessed it will ask to run the configuration wizard. This procedure will be used to set the initial configuration.
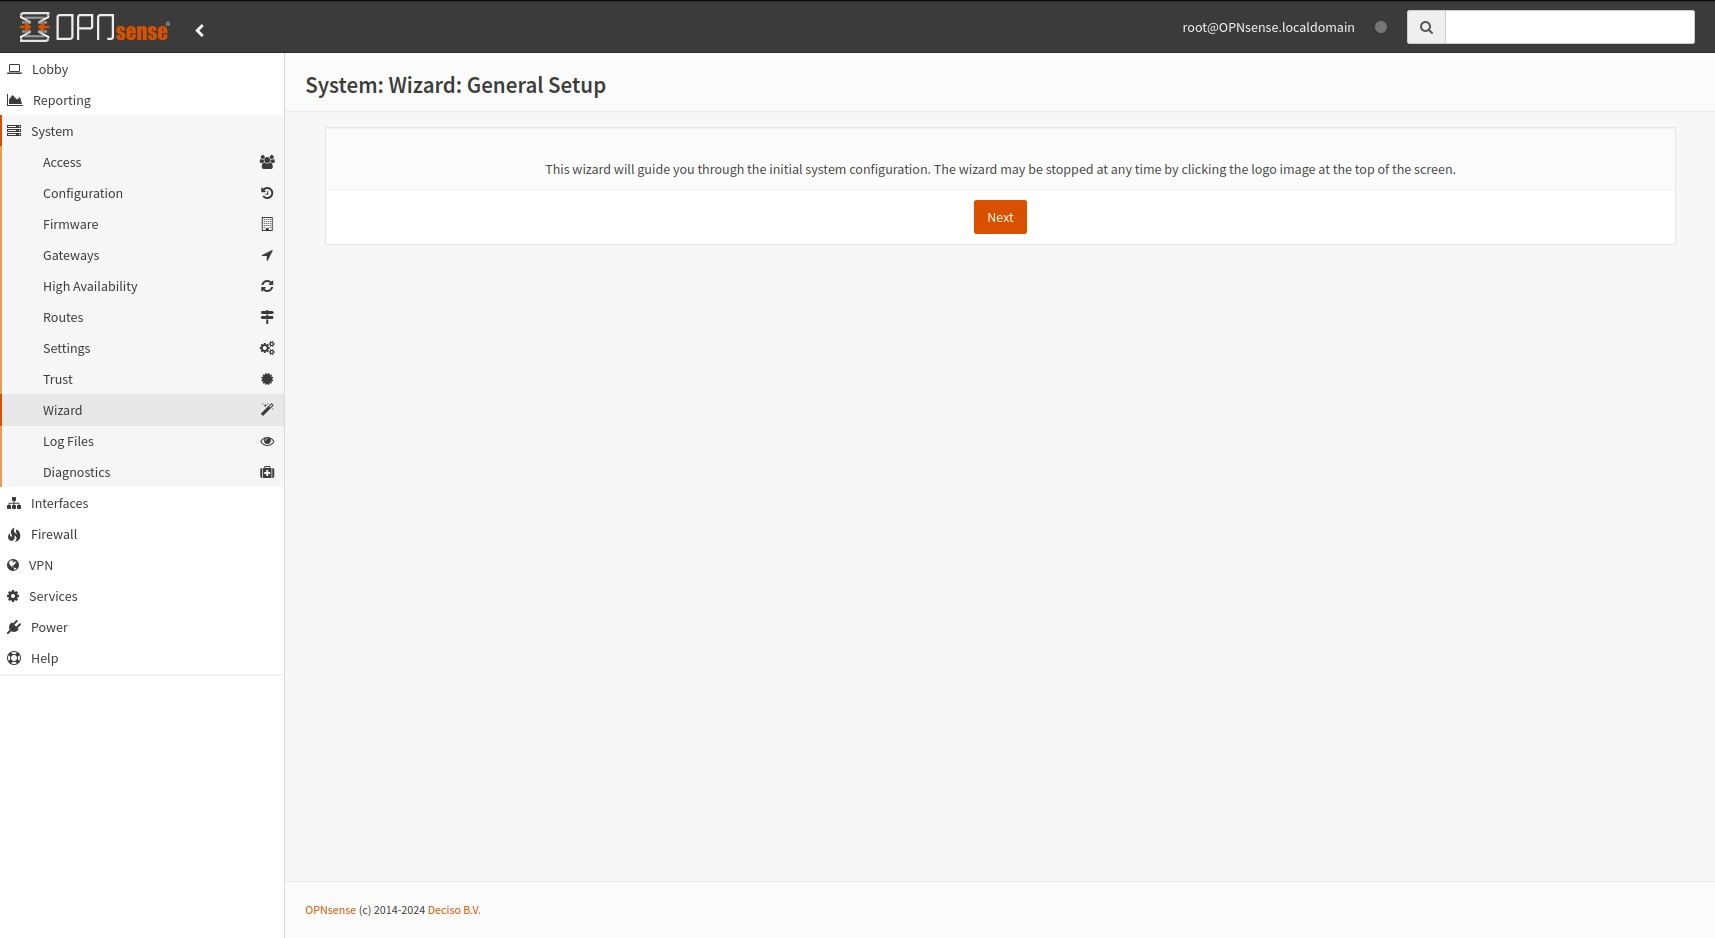
OPNsense wizard
On the general information a hostname must be selected, for the DNS servers I have selected OpenDNS IPs 208.67.222.222, and 208.67.220.220, keep the rest of the fields as they are.
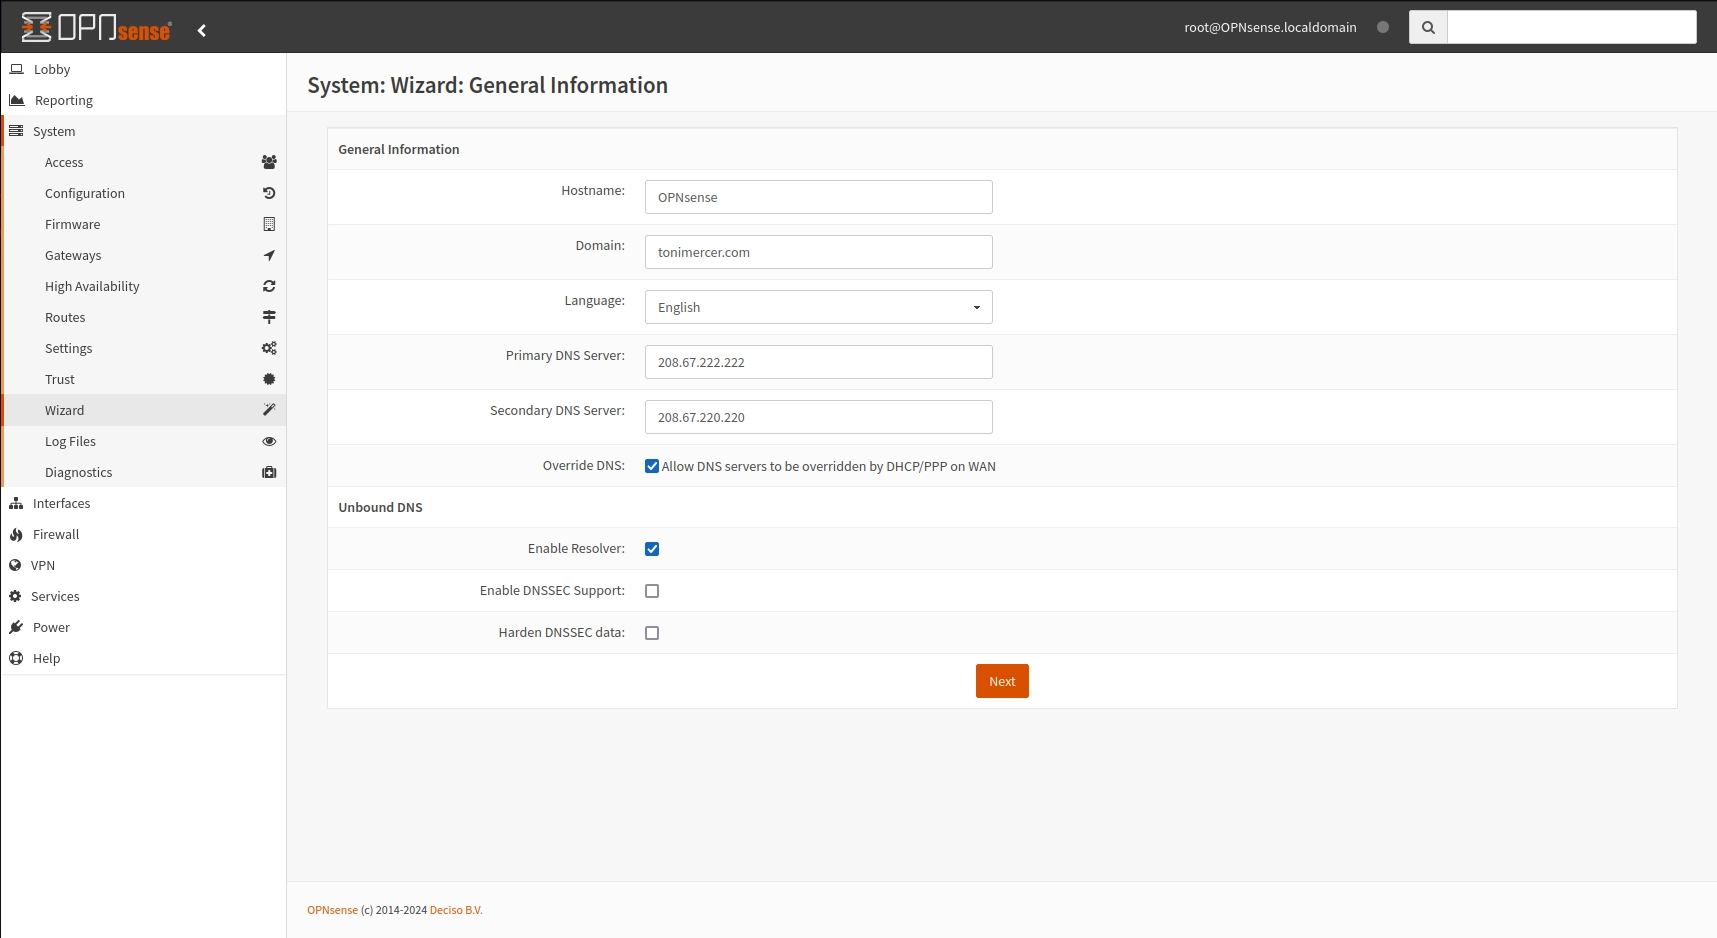
OPNsense wizard - general information
Leave the time-server hostname and timezone as they are filled and move to the next screen.
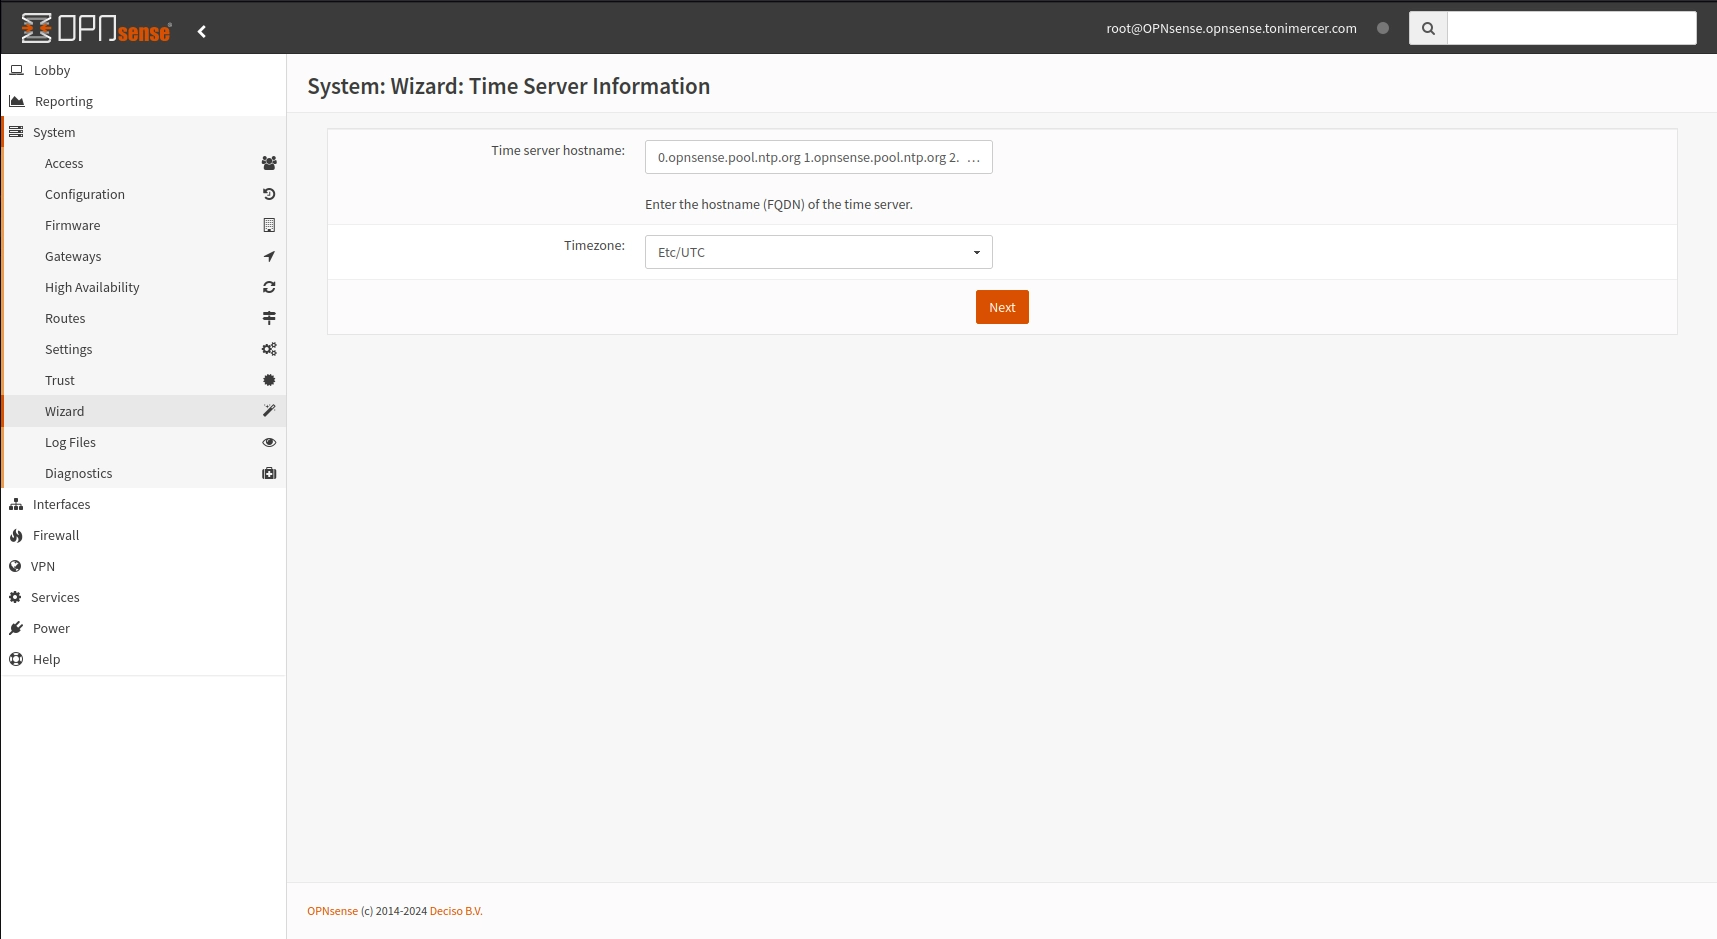
OPNsense wizard - time-server information
As there is a DHCP server enabled on the ISP router there is no change on this screen.
Leave the LAN as default too, as later on it will be modified.
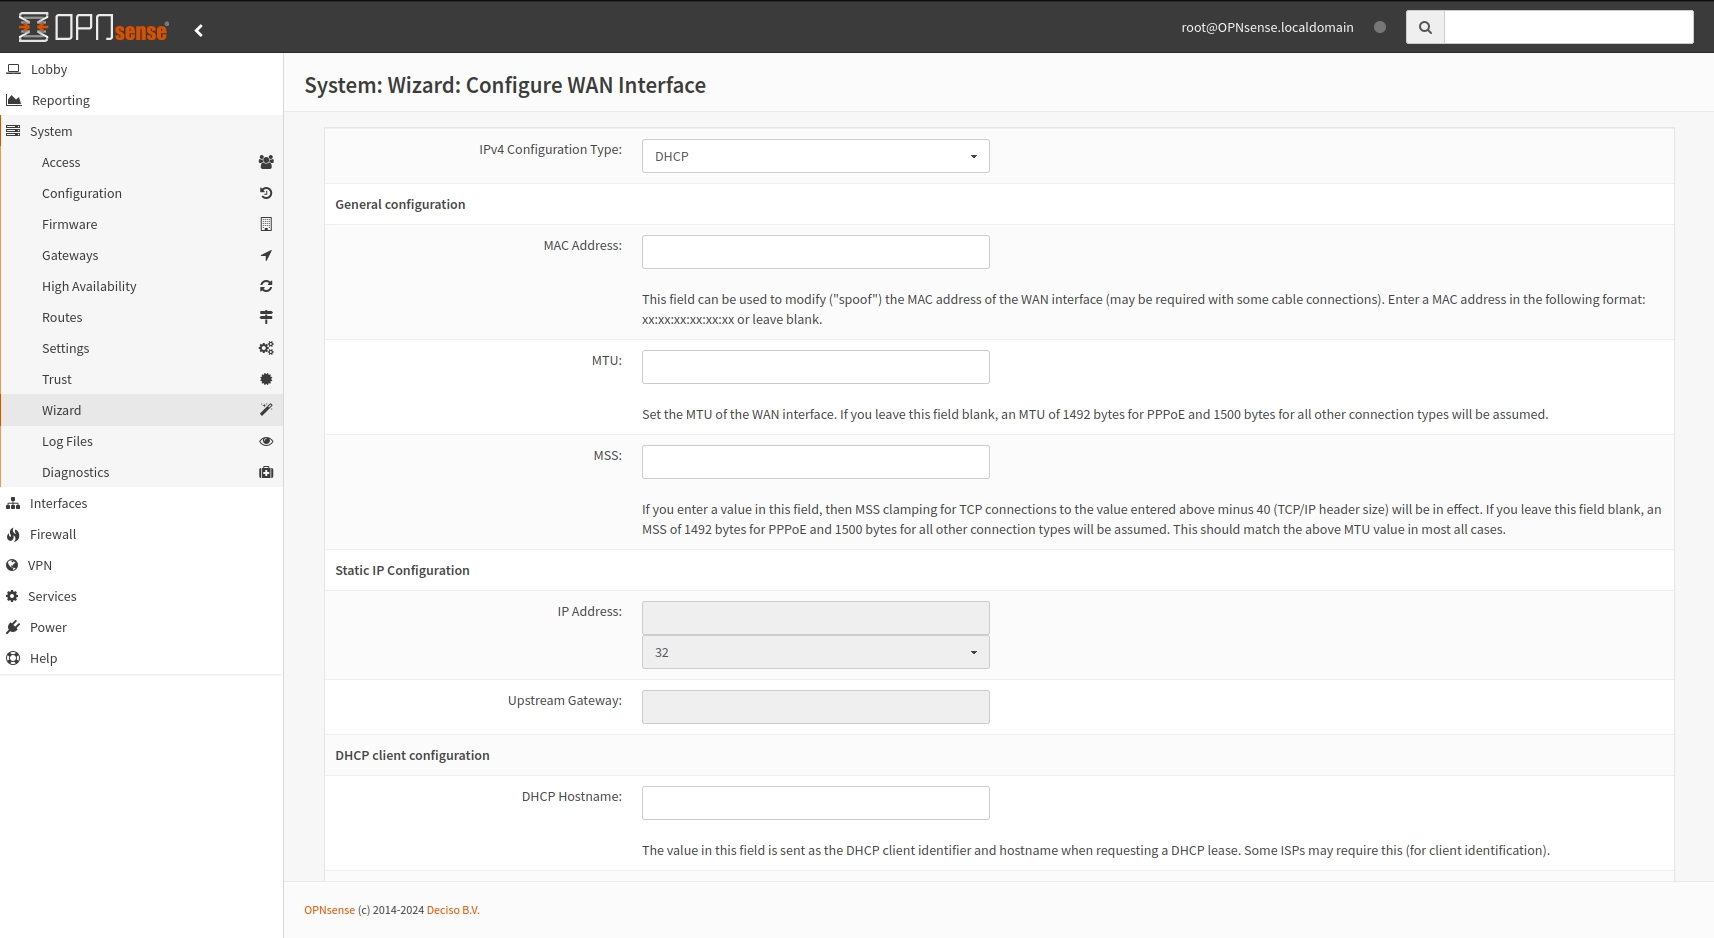
OPNsense wizard - WAN setup
Now the firewall will set the configuration accordingly and restart the necessary processes.
OPNsense wizard - restart
On the Proxmox console the LAN now has the correct subnet.
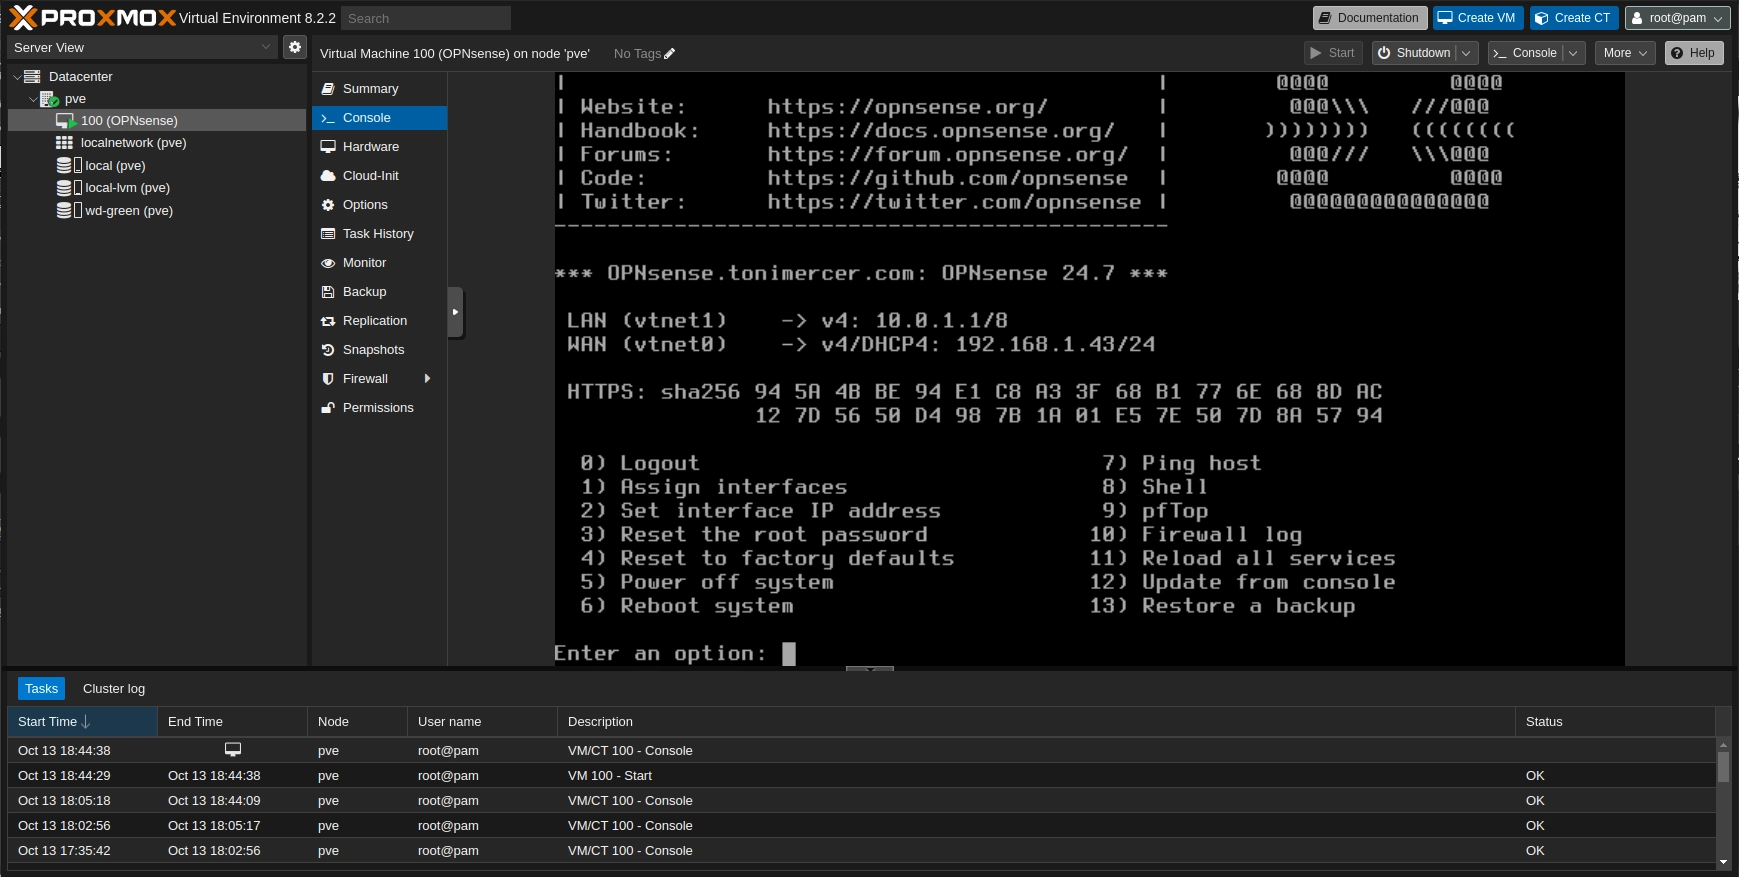
OPNsense wizard - VM confirmation
Don't plug the LAN to your subnet, or you will have two DHCP servers at the same time. You may end without network connection till you disconnect it.
OPNsense third interface for management on Proxmox management subnet
Now the OPT interface and LAN interface has to be swapped.
Disable the DHCP on the LAN interface. Go to Services > ISC DHCPv4 > [LAN] and uncheck the Enable tick.
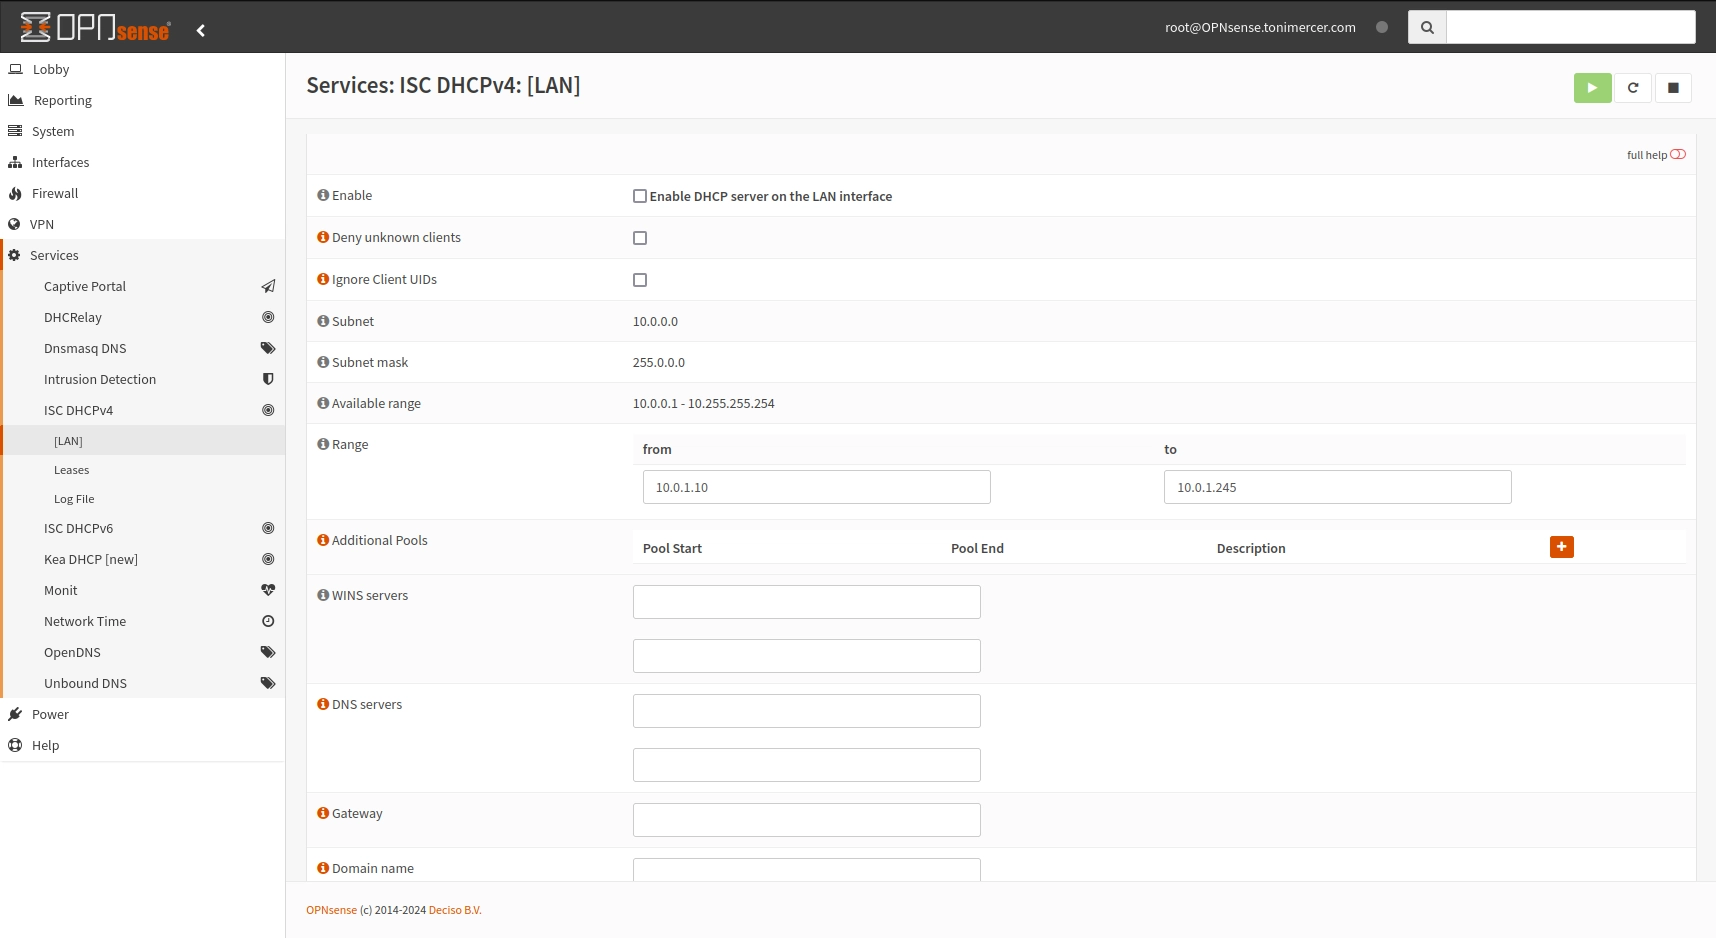
OPNsense - Services > ISC DHCPv4 > [LAN]
Add the vmbr0 network to the OPNsense vm.
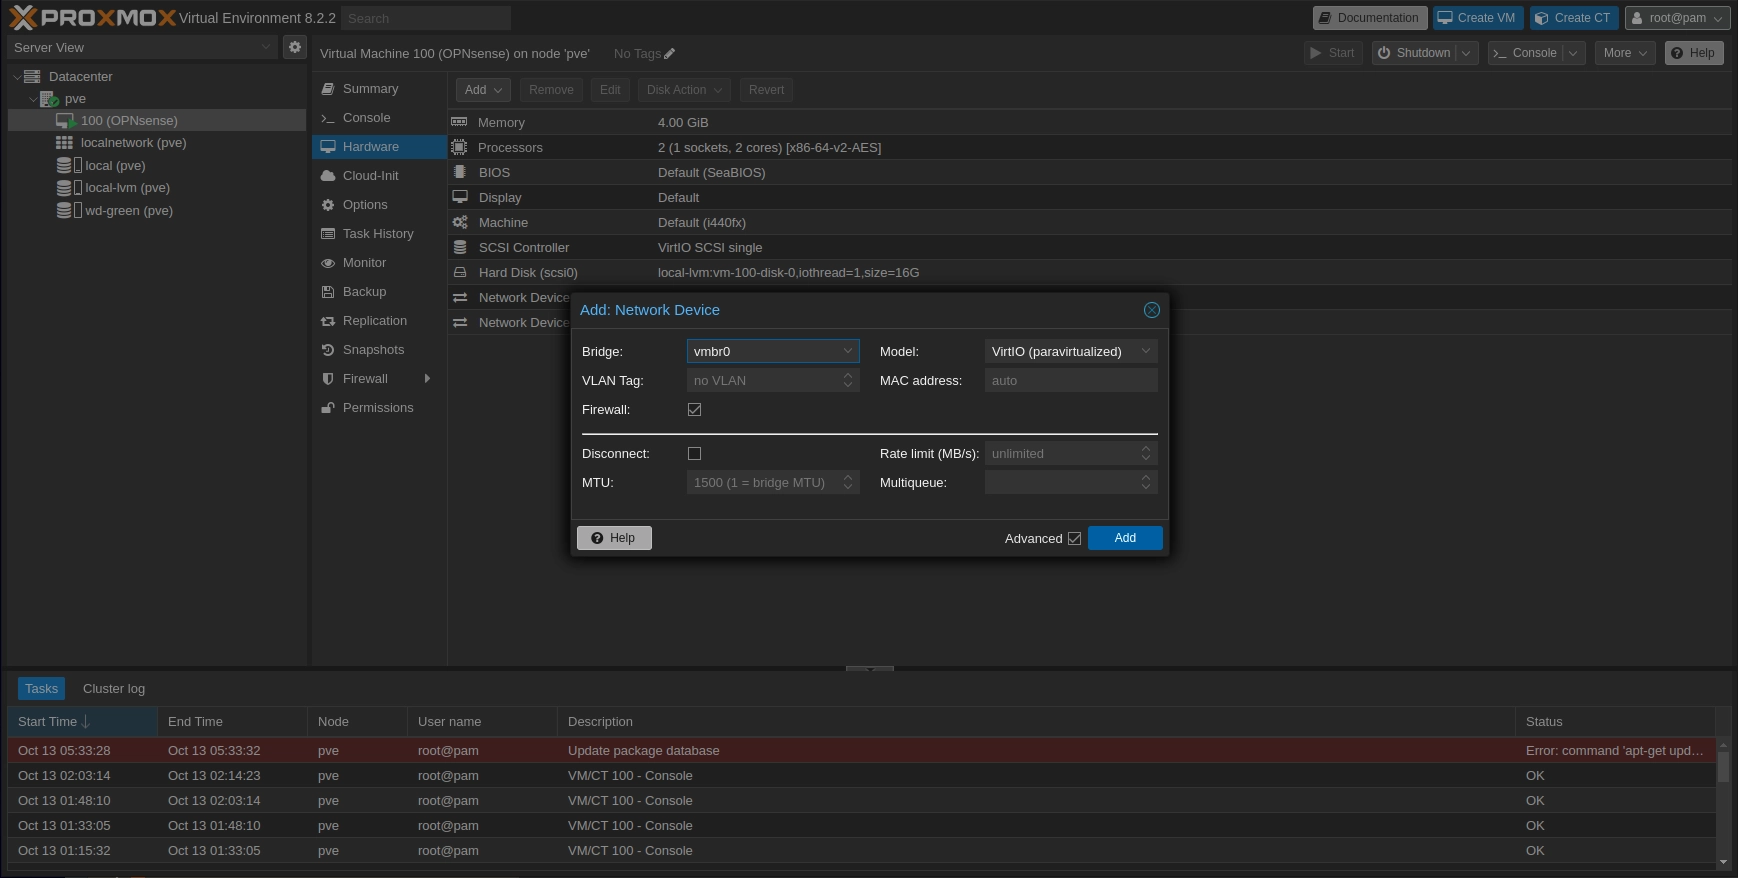
Proxmox hardware page
From the OPNsense GUI go to Interfaces > Assignments and add the newly added interface. Add a comment indicating is the new LAN for VMs interface. I used VMs_LAN
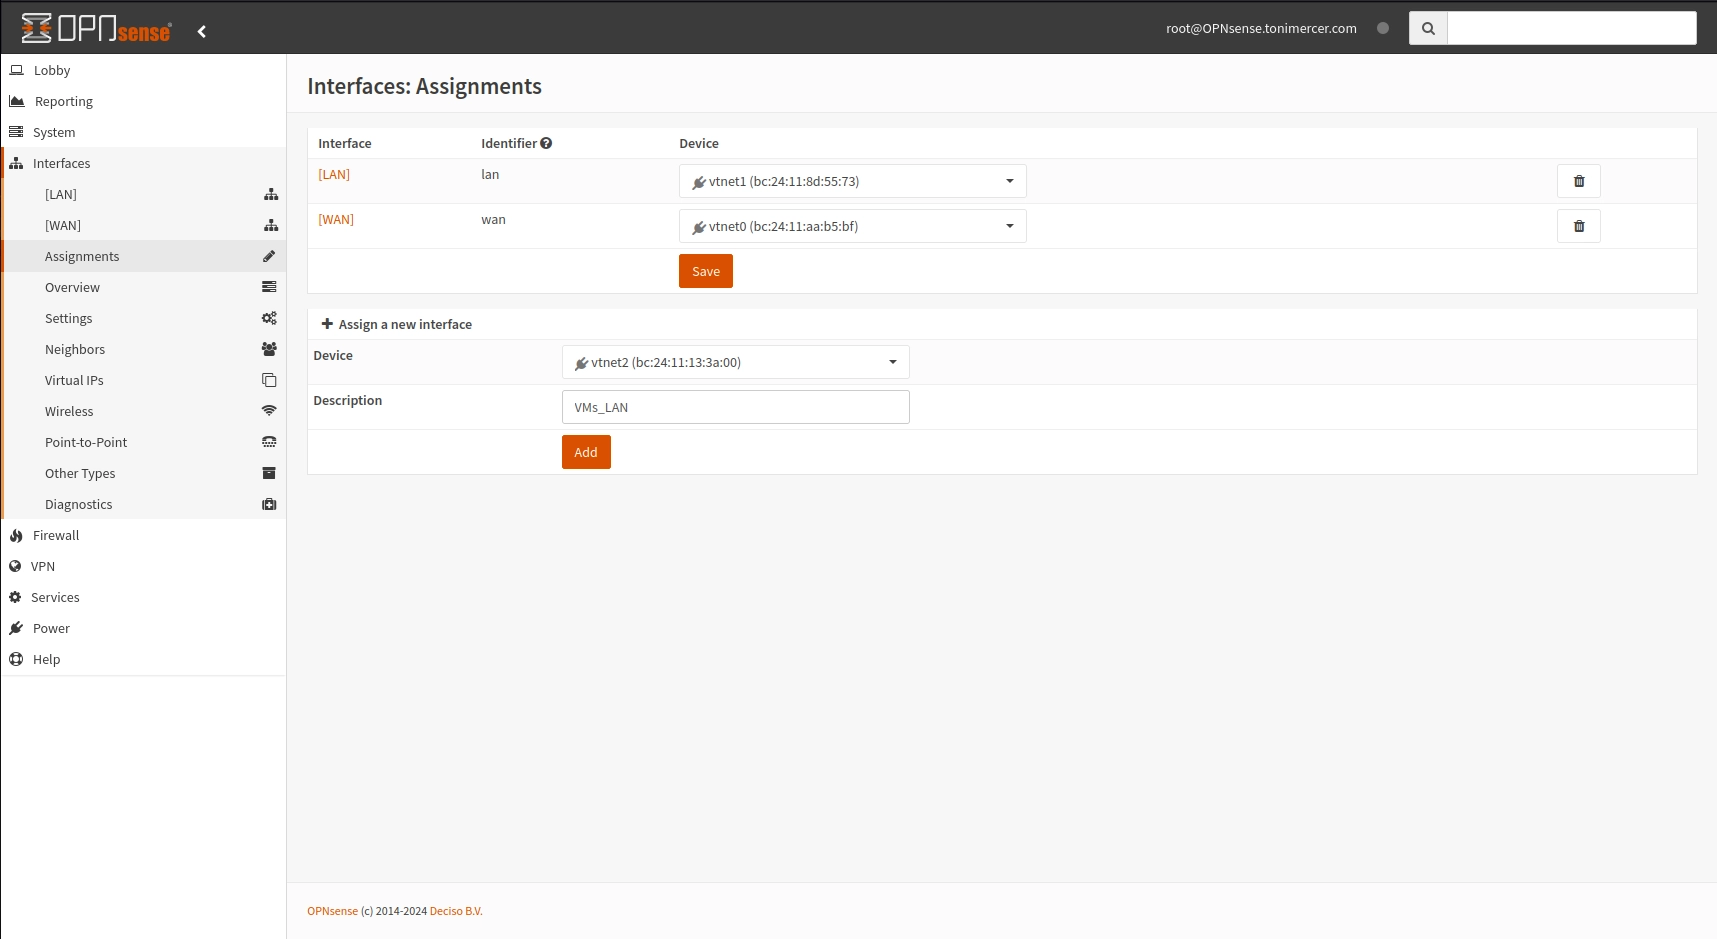
OPNsense Interfaces: Assignments
On OPNsense go to Interfaces > [LAN]. Check Prevent interface removal, and on IPV4 Configuration type select DHCP. Save and apply the changes. Now the LAN is waiting to get a DHCP IP. Now on the PVE console you need to reassign the interfaces.
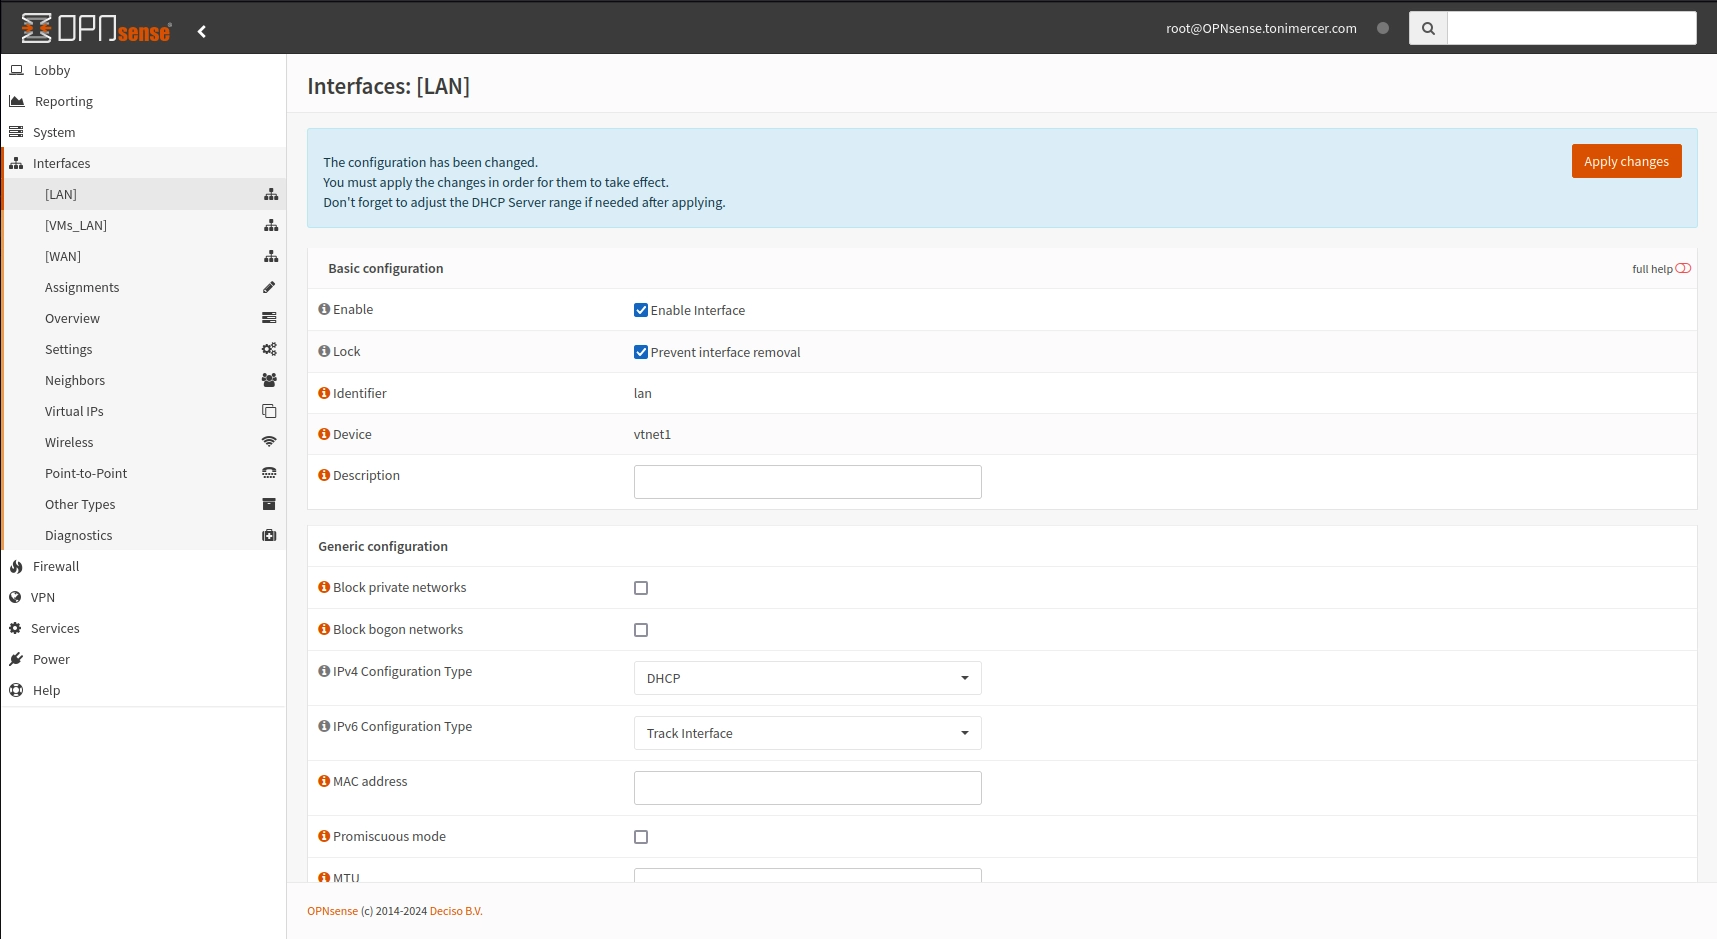
OPNsense Interfaces: [LAN]
To reassign the interfaces login with the root user and press 1. Skip with n the LAGGs and VLANs configs. Fill the interface name for WAN, LAN, and OTP1. This time you have to switch the Proxmox Linux Bridge for management vmbr0 with OPNsense LAN interface.
As the lan is expecting for an IP from the DHCP the management router will allocate an IP for the LAN and the VMs_LAN interface will become the interface for the VMs. This allows us to control the firewall from the LAN.
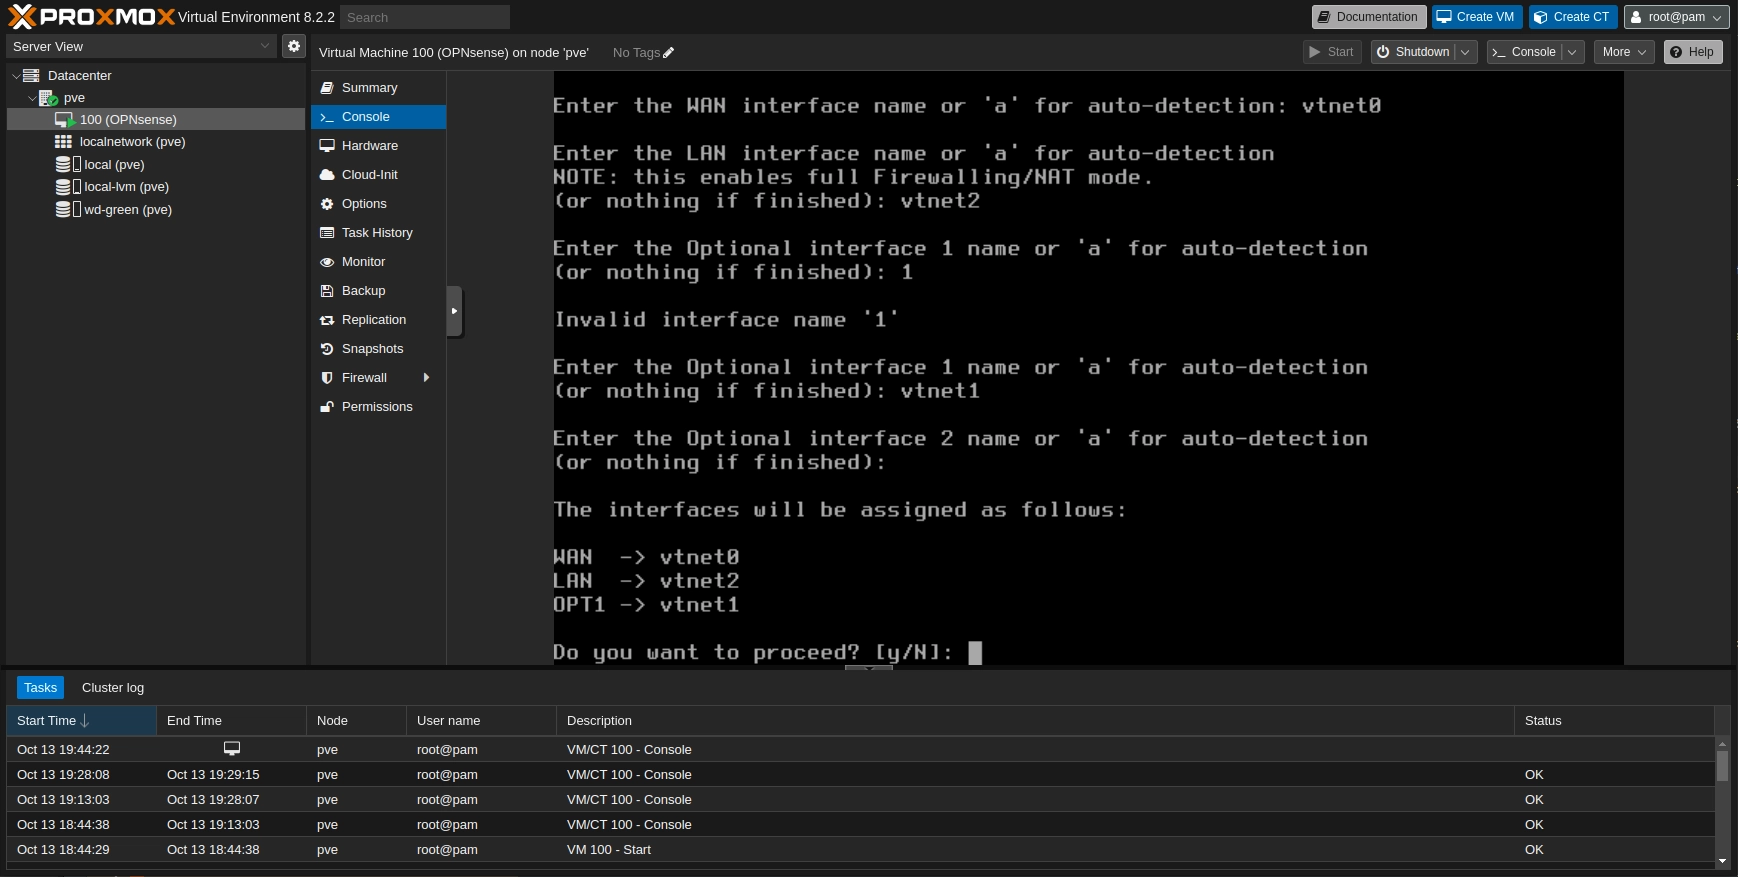
Proxmox: OPNsense: Console
To login now you have to reconnect your computer to the management subnet. On the console of Proxmox your new assigned IP for the LAN should be displayed. If it does not get an IP directly restart the services using the option 11.
Now go to Interfaces > [VMs_LAN]. Enable and check Prevent interface removal, and on IPV4 Configuration type select Static IPv4. Scroll down a bit and on IPv4 address fill the field with 10.0.1.1 and 24 for the mask. Save the changes and apply the configuration.
Apply the changes after saving the configuration.
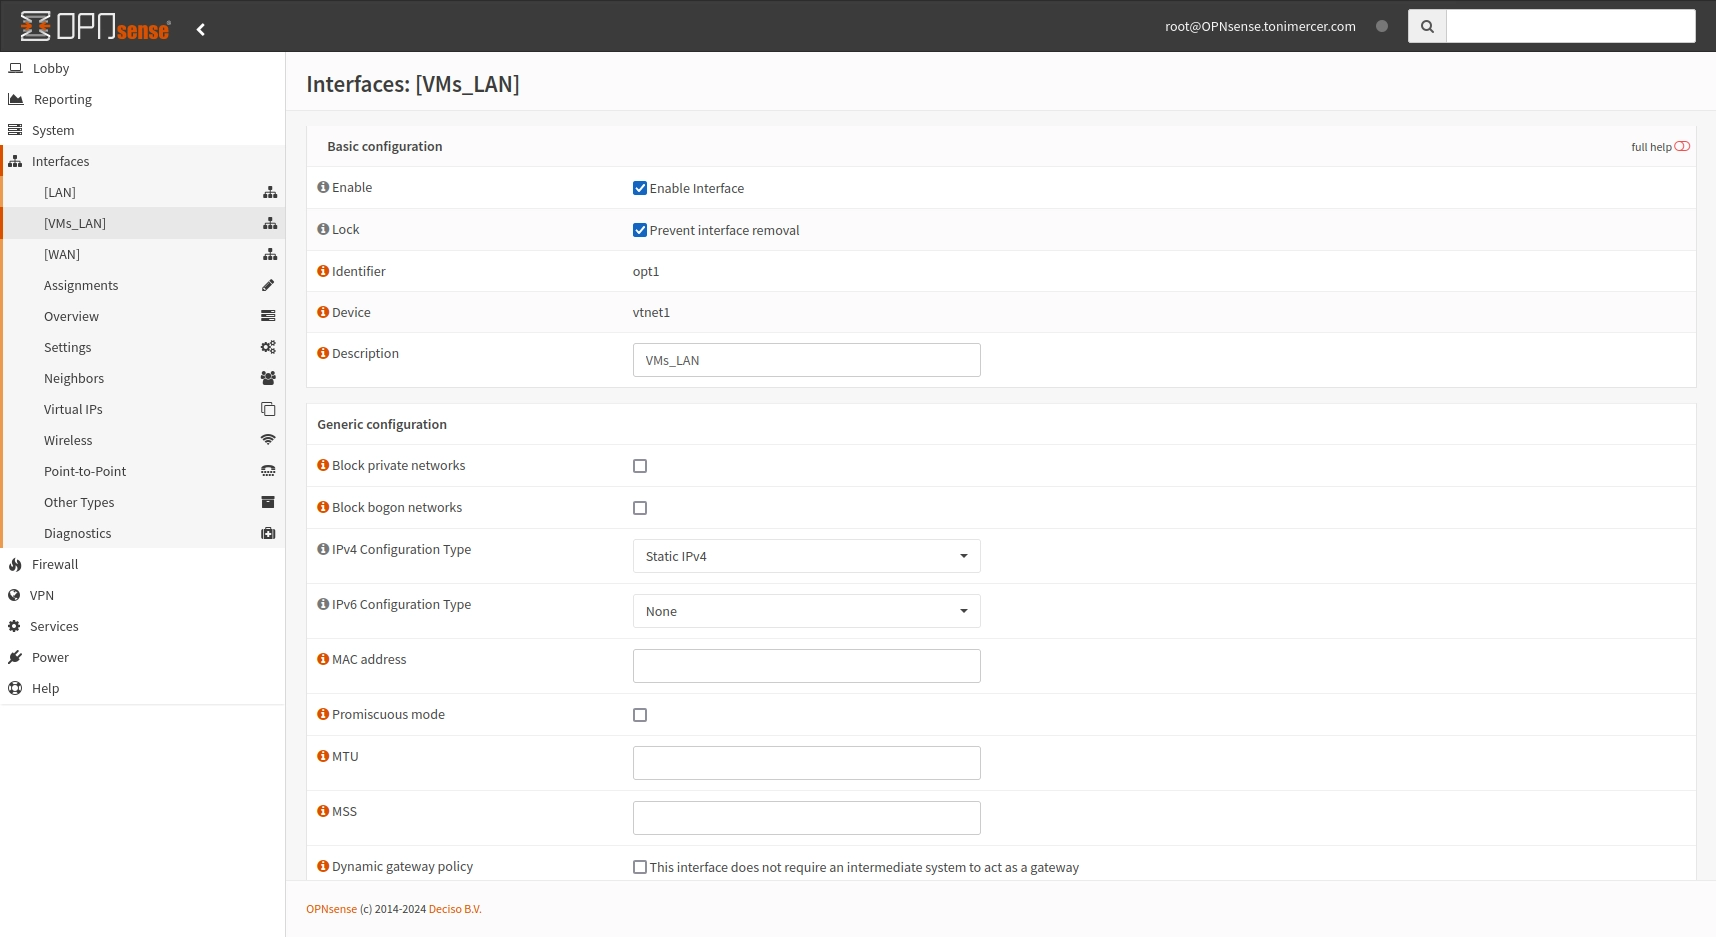
OPNsense Interfaces: [VMs_LAN]
Now we have to enable the DHCP in the VMs_LAN subnet if we don't want to configure each IP statically for each VM.
Go to Services > ISC DHCPv4 > [VMs_LAN] check Enable and fill the range according to your needs.
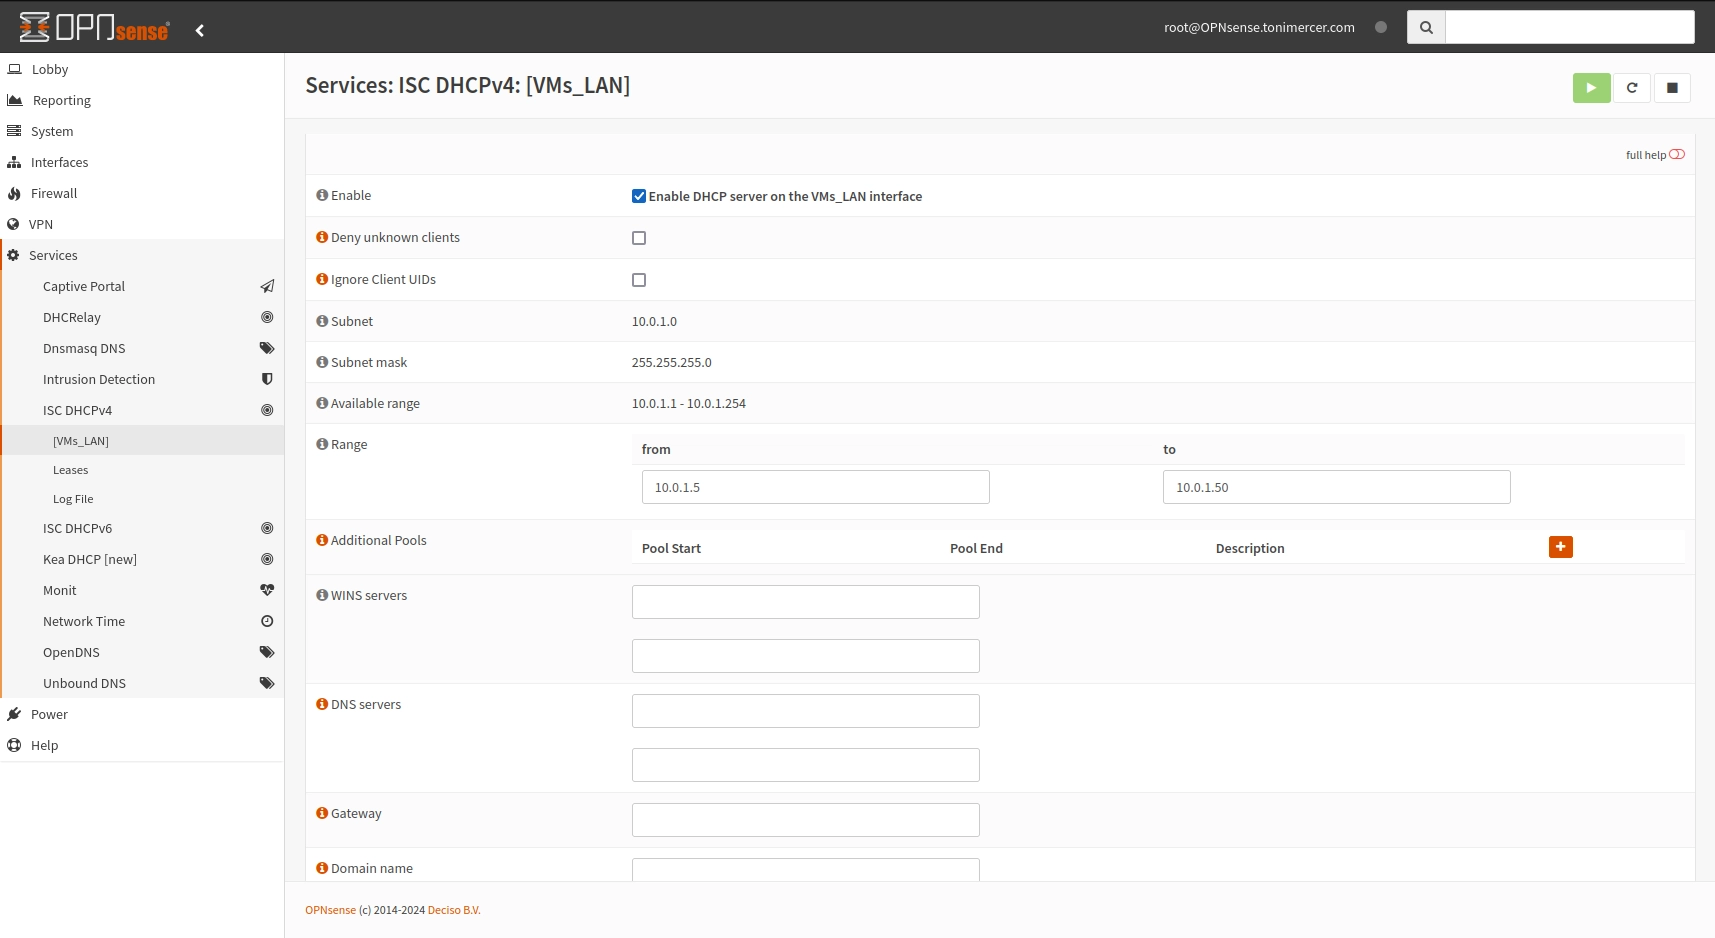
OPNsense Services: ISC DHCPv4: [VMs_LAN]
Reboot the router.
While trying to find ways to isolate OPNsense GUI on an interface I found that using OPX instead of LAN interface proved to be problematic.
The Interface swap feels like is not the appropriate way to do it, but it does the job.
We still need to add several firewall rules to allow the VMs to reach the public domain but protect the firewall GUI from internal VMs access.
Go to Firewall > Rules > VMs_LAN and press the + button
| Protocol | Source | Description |
| IPv4+6 TCP/UDP | VMs_LAN net |
Allow DNS queries
92edd3440d2e8d0084491c2572d3a0a7
|
| IPv4+6 UDP | VMs_LAN net |
Allow NTP queries
53d1e8b736007b6f352bc477ddde8f84
|
| IPv4+6 ICMP | VMs_LAN net |
Allow ICMP to the firewall
9df5b694d04707472ffeef50a7dd5fda
|
| IPv4+6 * | VMs_LAN net |
Route all traffic not pointing to the firewall
9d2b95065ac99a8791a2f0fe64831c1f
|
Note:
On the last rule check the ! You have to enable Use this option to invert the sense of the match. on the destination.
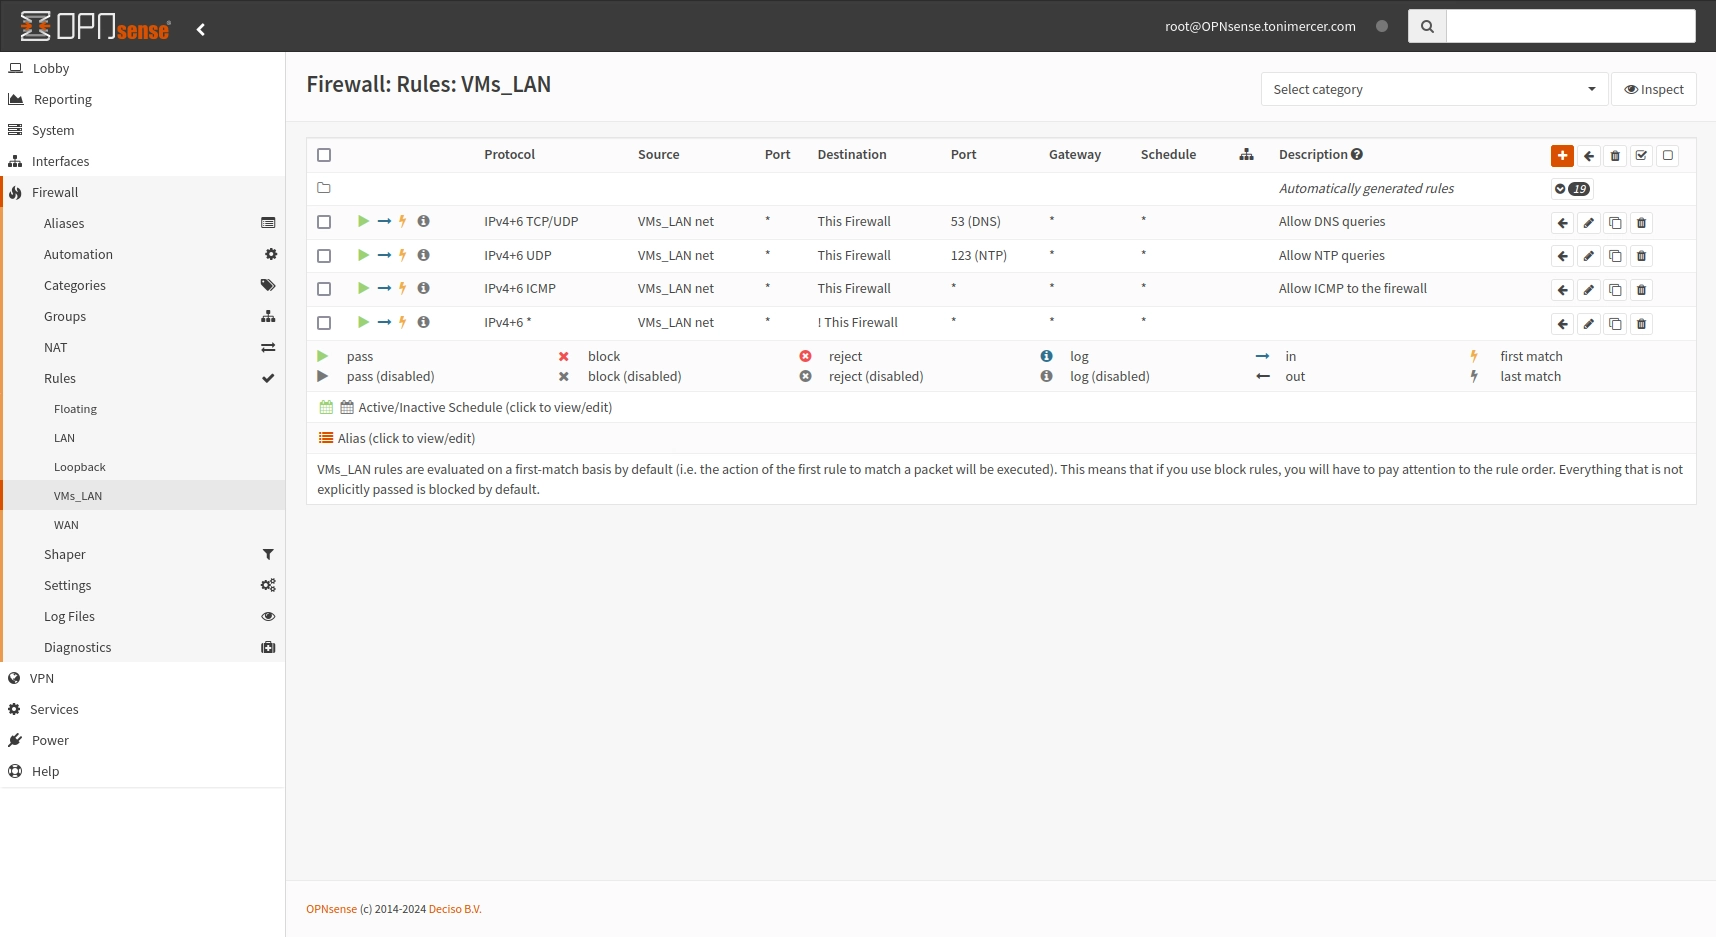
OPNsense Firewall: Rules: VMs_LAN
After this rules the VMs will be able to resolve the DNS queries and access the public domain. Ping to the firewall has been added for debugging purposes and NTP queries have been allowed as well. All the rest connection have been rejected on the last rule by allowing everything not targeting the router.
If you spot any typos, have questions, or need assistance with the build, feel free to contact me at: antonimercer@lthjournal.com
This guide contains no affiliate links or ads. If you'd like to support this or future projects, you can do so here:
By supporting monthly you will help me create awesome guides and improve current ones.
Technologies used
Proxmox VE, OPNsense